A two-factor authentication system adds a layer of verification regarding the identity of a user wishing to log in to a platform or application. It can be seen as a burden by users as it requires an extra step to access the desired content, but in some cases, it is essential to ensure the security of user data. Two-factor authentication also makes it more difficult for a bot to automate login, reducing the chances of spam and fraud. Considered a strong authentication method, two-factor authentication requires your users to provide two distinct proofs of identity. This authentication method is often encountered, without even realising it, with credit card payments. Indeed, paying with your credit card by entering your secret code is a form of two-factor authentication, the first proof being possession of the credit card and the second, the secret code.
There was a time when the majority of two-factor authentications (A2F) were done via email. Authenticating via email can be tedious for the user: having to open their inbox, wait for the email to arrive, open it, then copy-paste the code or click on a link can discourage many. Furthermore, an email inbox can be open simultaneously on a multitude of different devices, increasing the number of possible intrusion vectors.
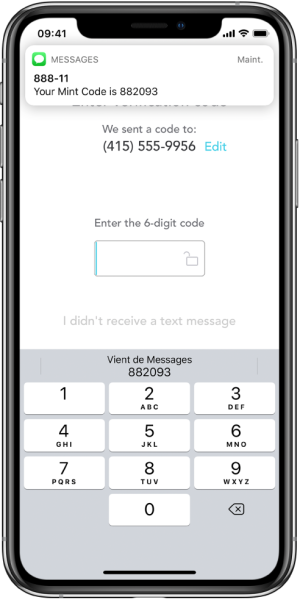
As you've probably guessed from the title of this article, we will look at how to implement an A2F system using SMS. The principle is that the user confirms their authentication by entering a code they receive via SMS, called One Time Password (OTP) This method of two-factor authentication is more user friendly, especially with the added ability since iOS 12 to automatically fill a field with the code received via SMS.
In the rest of this article, we will see how we can implement SMS two-factor authentication on an application by
React Native.
Flow
To integrate this two-factor authentication system, let's first look at the sequence of events.
In our application, when a user tries to log in, we will generate an OTP and save it in a database, indicating an expiry date. Using an API, we will then send this code via SMS to the user, who can then enter it to complete the authentication.
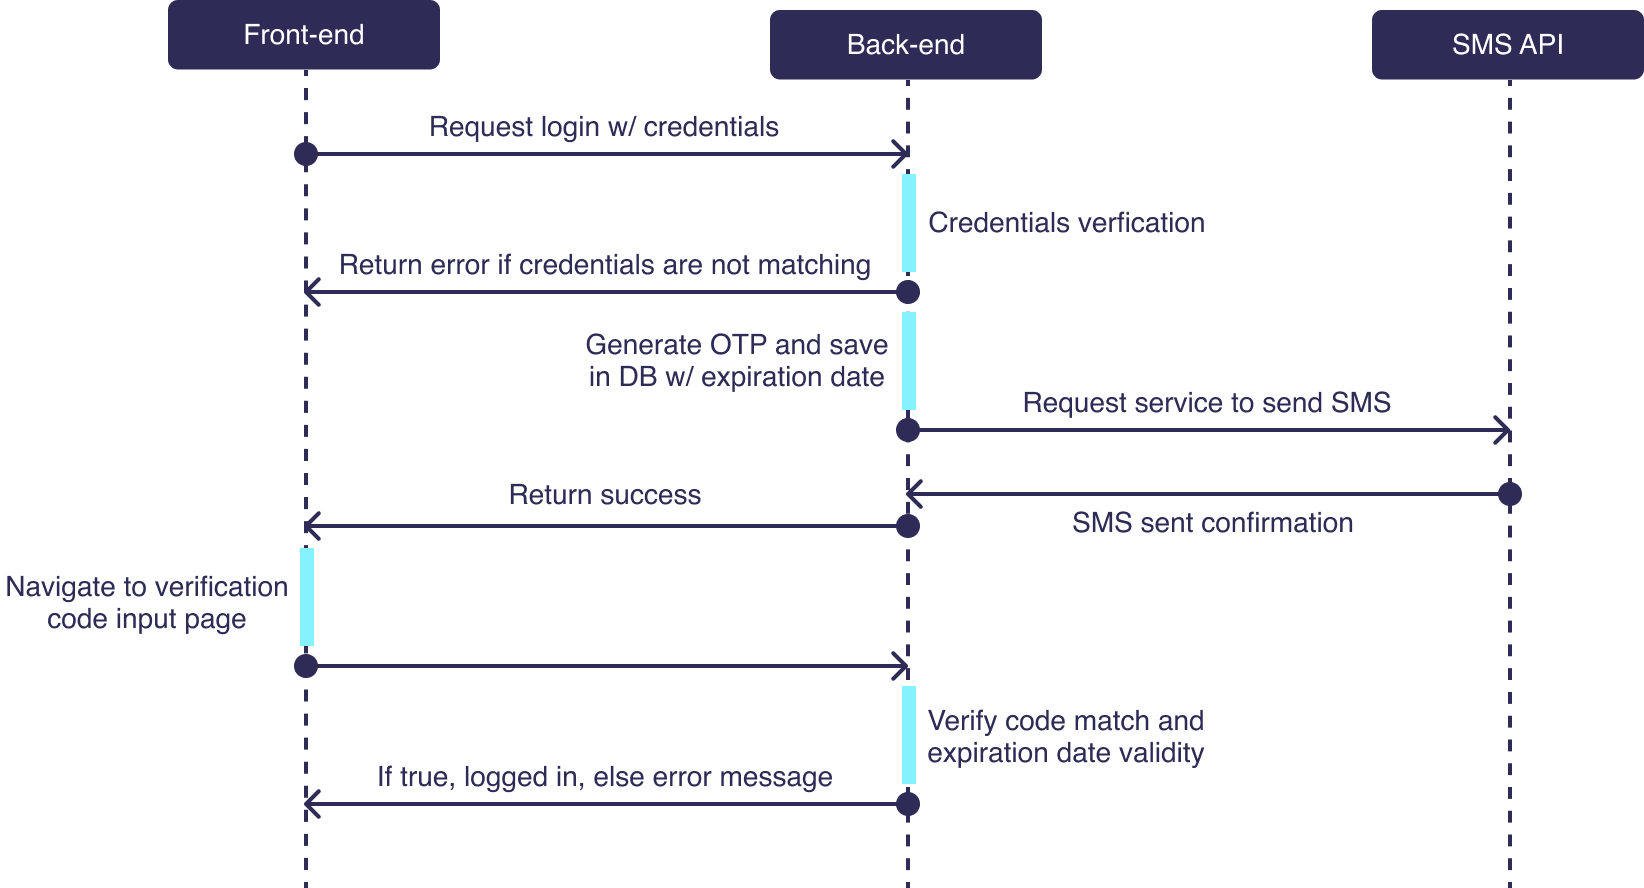
Diagram of exchanges between the frontend, backend, and SMS API
Prerequisites
In the rest of the article, we assume that an authentication system with login and password exists, and we explain how to integrate SMS verification into it. We also assume that users' phone numbers are stored in the database.
The following technologies are used:
SMS sending service
In order to send SMS messages containing verification codes, we will use the service
Twilio.
Twilio also provides
Verify, which is an all-in-one API for managing the sending of verification codes. In this article, so that the method presented is applicable to any SMS sending service, we will use Twilio's classic SMS sending API.
By default, a dispatch number is displayed to the SMS recipient. If you want the sender to be displayed in alphanumeric format, you can consult
this article.

On the right screen, the sender's name is in alphanumeric format.
OTP Creation and Sending
Once the user has entered their credentials and the application has verified that they are correct, we generate an OTP using the library
generate-sms-verification-code :
import * as phoneToken from 'generate-sms-verification-code'

const generateUserVerificationCode = () => {
  return phoneToken(4);
}
Here, a 4-digit code is generated.
We then save the code in the database with an expiration date:
await this.userRepository.update(user.userId, {
  smsOTP: verificationCode,
  otpExpirationDate: moment().add(5, 'm').toDate(),
});
Here, the code expires 5 minutes after its generation.
Now we need to send the code via SMS to the user via Twilio. To do this, it is necessary to have your Twilio Account SID and your Twilio Auth Token, both accessible from your Twilio console.
import * as twilio from 'twilio';
const accountSid = process.env.TWILIO_ACCOUNT_SID;
const authToken = process.env.TWILIO_AUTH_TOKEN;
const client = twilio(accountSid, authToken);
async sendSMSToUser(user: User, body: string) {
const smsSent = await client.messages.create({
body,
to: user.phoneNumber,
from: process.env.TWILIO_PHONE_NUMBER,
});
return !!smsSent.sid;
}
The code above creates a Twilio client used to call the SMS sending API with the method
create of the object
messages. You can find the complete code for generating and sending the code integrated into an authentication system
here.
Verification Code Entry
Now that your users receive a code when they try to log in, they must be able to enter it into your application to finalise authentication. For this, we use the library
react-native-confirmation-code-field, which allows for the creation of text fields specifically designed for codes.
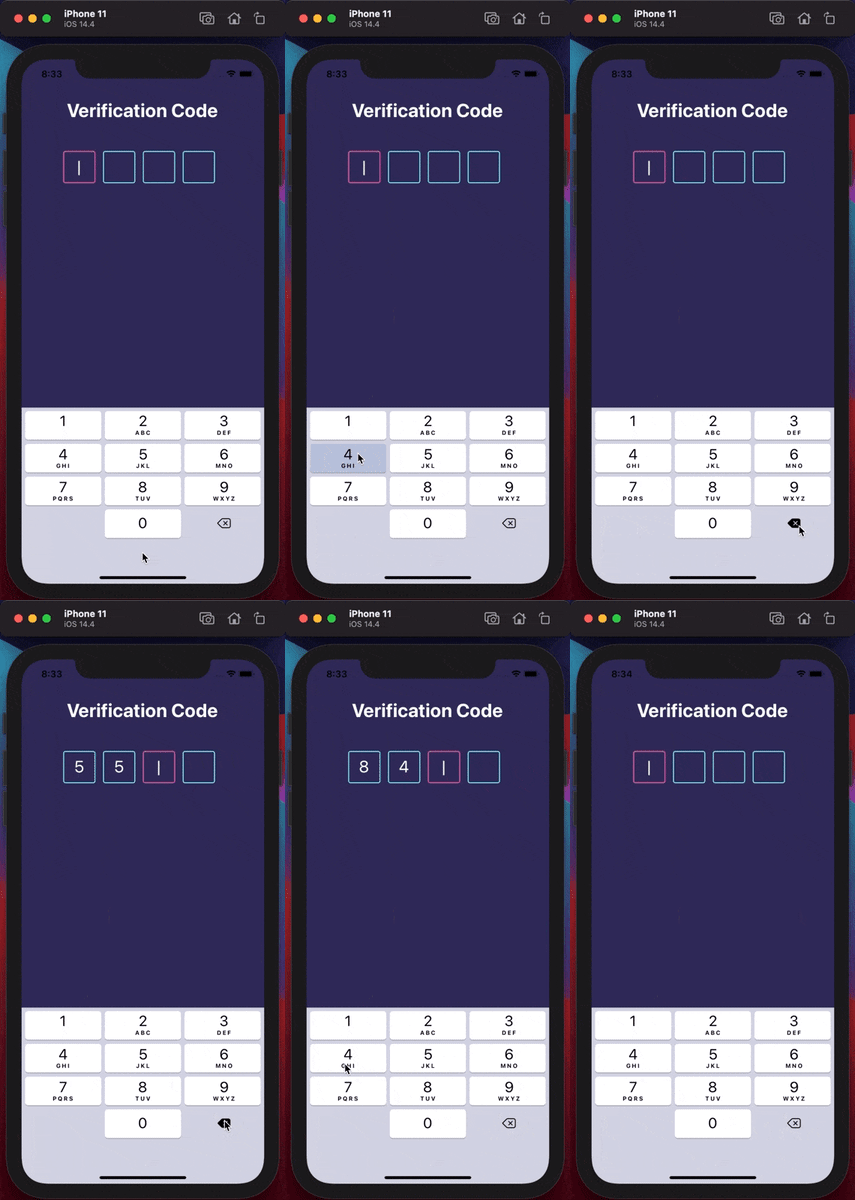
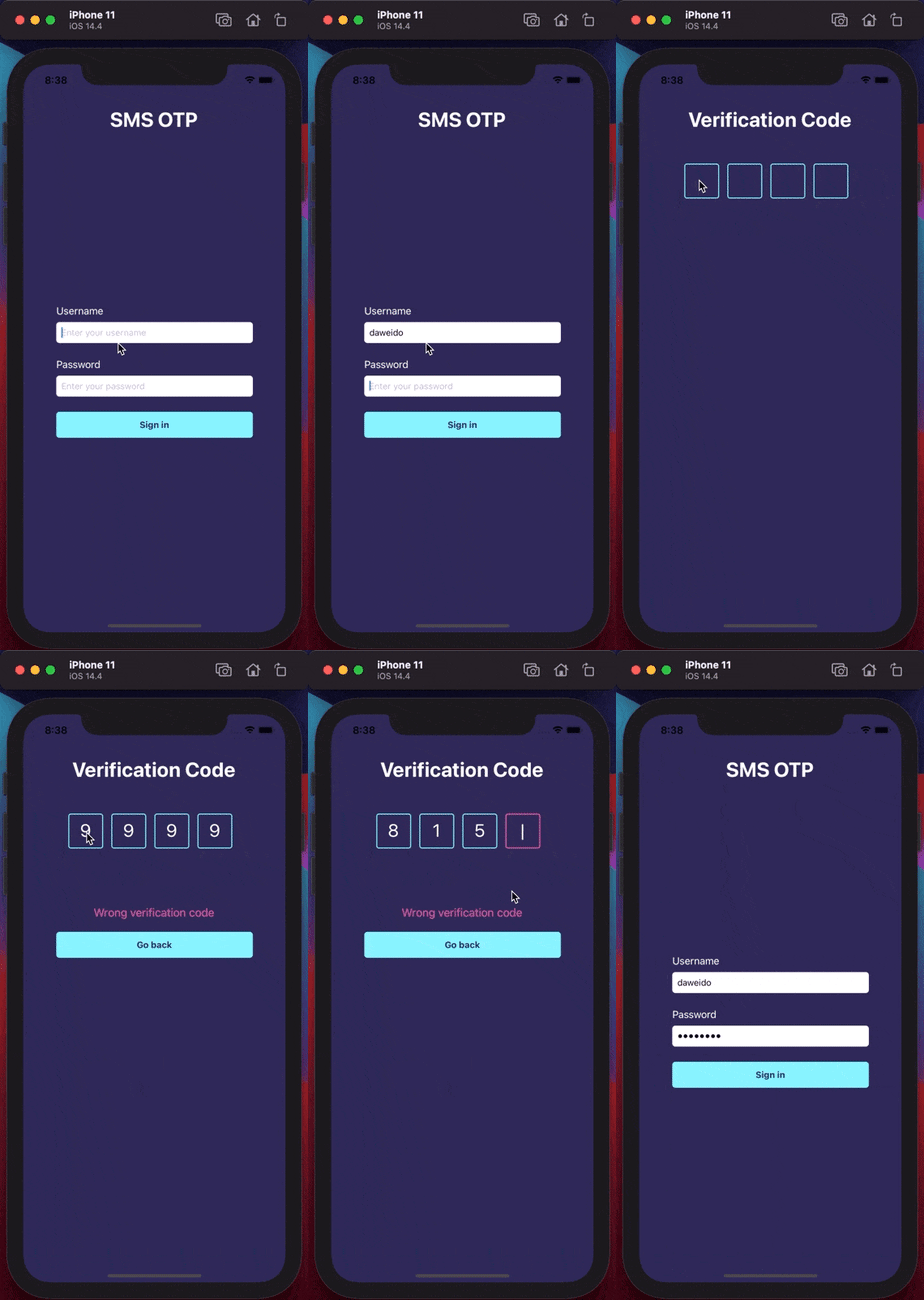
Example of a screen coded in React Native allowing a code to be entered
This library allows us to automatically call a function when the verification code has finished being entered (thanks to the property onFulfill), as well as automatically populate the code sent via SMS on iOS.
In our code, we have named this function onCodeInputFulfilled: it sends the code entered by the user to the backend, which returns a response to the frontend indicating whether the code is valid or not, with an error if applicable. Depending on the result, the user is redirected to a success screen, or an error message is displayed.
const onCodeInputFulfilled = (value: string) => {
  setIsProcessing(true);
  submitVerificationCode(value, route.params.userId).then((res) => {
    setIsProcessing(false);
    if (res.success) {
      navigation.navigate('SuccessScreen');
    } else {
      setErrorMessage(res.errorMessage);
    }
  });
};
Code Verification
Here is the backend code to verify if the SMS-sent code is valid:
@Post('/verifyCode')
async verifyUserCode(@Body() data, @Res() res) {
  const verificationResult = await this.userService.verifyUserCode(
    data.userId,
    data.verificationCode,
  );

  res.status(HttpStatus.OK).send({
    success: verificationResult.success,
    errorMessage: verificationResult.errorMessage,
  });
}}
Here, the function verifyUserCode is called following a request to the route /verifyCode. It calls another function verifyUserCode present in the NestJS service managing users, which we have called here userService :
async verifyUserCode(userId: number, verificationCode: string) {
  const retrievedUser = await this.userRepository.findOne({ userId });

  if (verificationCode !== retrievedUser.smsOTP) {
    return { success: false, errorMessage: 'Wrong verification code' };
  } else if (moment().isAfter(retrievedUser.otpExpirationDate)) {
    return { success: false, errorMessage: 'Verification code expired' };
  } else {
    return { success: true };
  }
}
This function verifies that the code entered by the user and the code generated and saved in the database are the same. It also verifies that the code has not expired.
The result is then sent to the frontend, with an error if applicable.
Conclusion
Well done! You have just learned how to integrate a two-factor authentication system using a verification code sent via SMS, with automatic population of the code received on iOS. We accomplished this using React Native and NestJS, but the logic presented can be applied to other technologies.
Let's summarise what we have seen in the article. To integrate a two-factor SMS authentication system into a simple authentication, you must first ensure you have your users' phone numbers. When the user taps the login button on your application, a credential verification must be performed on your backend. If they are correct, you then need to generate an OTP, save it in your database associating it with the user, and send it via SMS using an SMS sending API. From the backend, when you have confirmation of the SMS being sent, you can then send a response back to the frontend to confirm the SMS dispatch. When the application receives this confirmation, you then need to change the screen displayed to the user and allow them to enter this newly received OTP. When the user has finished entering the received code, they then need to send it via a request to the backend to validate it. OTP validation is done by comparing the one stored in the database before the SMS was sent with the one entered on the application (while also checking the expiry date). If the entered code is correct, the user is authenticated and can be redirected to the appropriate screen.
To improve the user experience, it is advisable to display a button allowing the code to be resent if it is not received. It is preferable to make it inactive once pressed for 15 to 30 seconds, to avoid numerous sends which can be costly and overload the application's backend.
Here is the source code for the implemented system:
Finally, here is a GIF showcasing the complete journey of the newly implemented authentication system:
Case studies

_Zdsx9v.webp)