As part of a POC (proof of concept), a personal project, or a statistical study, you may need to scrape a website. Scraping is the automation, via a script, of retrieving certain data made available by a site. In this article, we assume you have basic knowledge of web scraping.
As legislation is vague and jurisprudence hesitant regarding scraping, we can only advise against practising it for commercial purposes, but we will nevertheless show you how to set up an IP-rotating scraping system using
Python,
Scrapy and Scrapoxy.
Case of Client Side Rendering: Exploiting the API
For sites running in
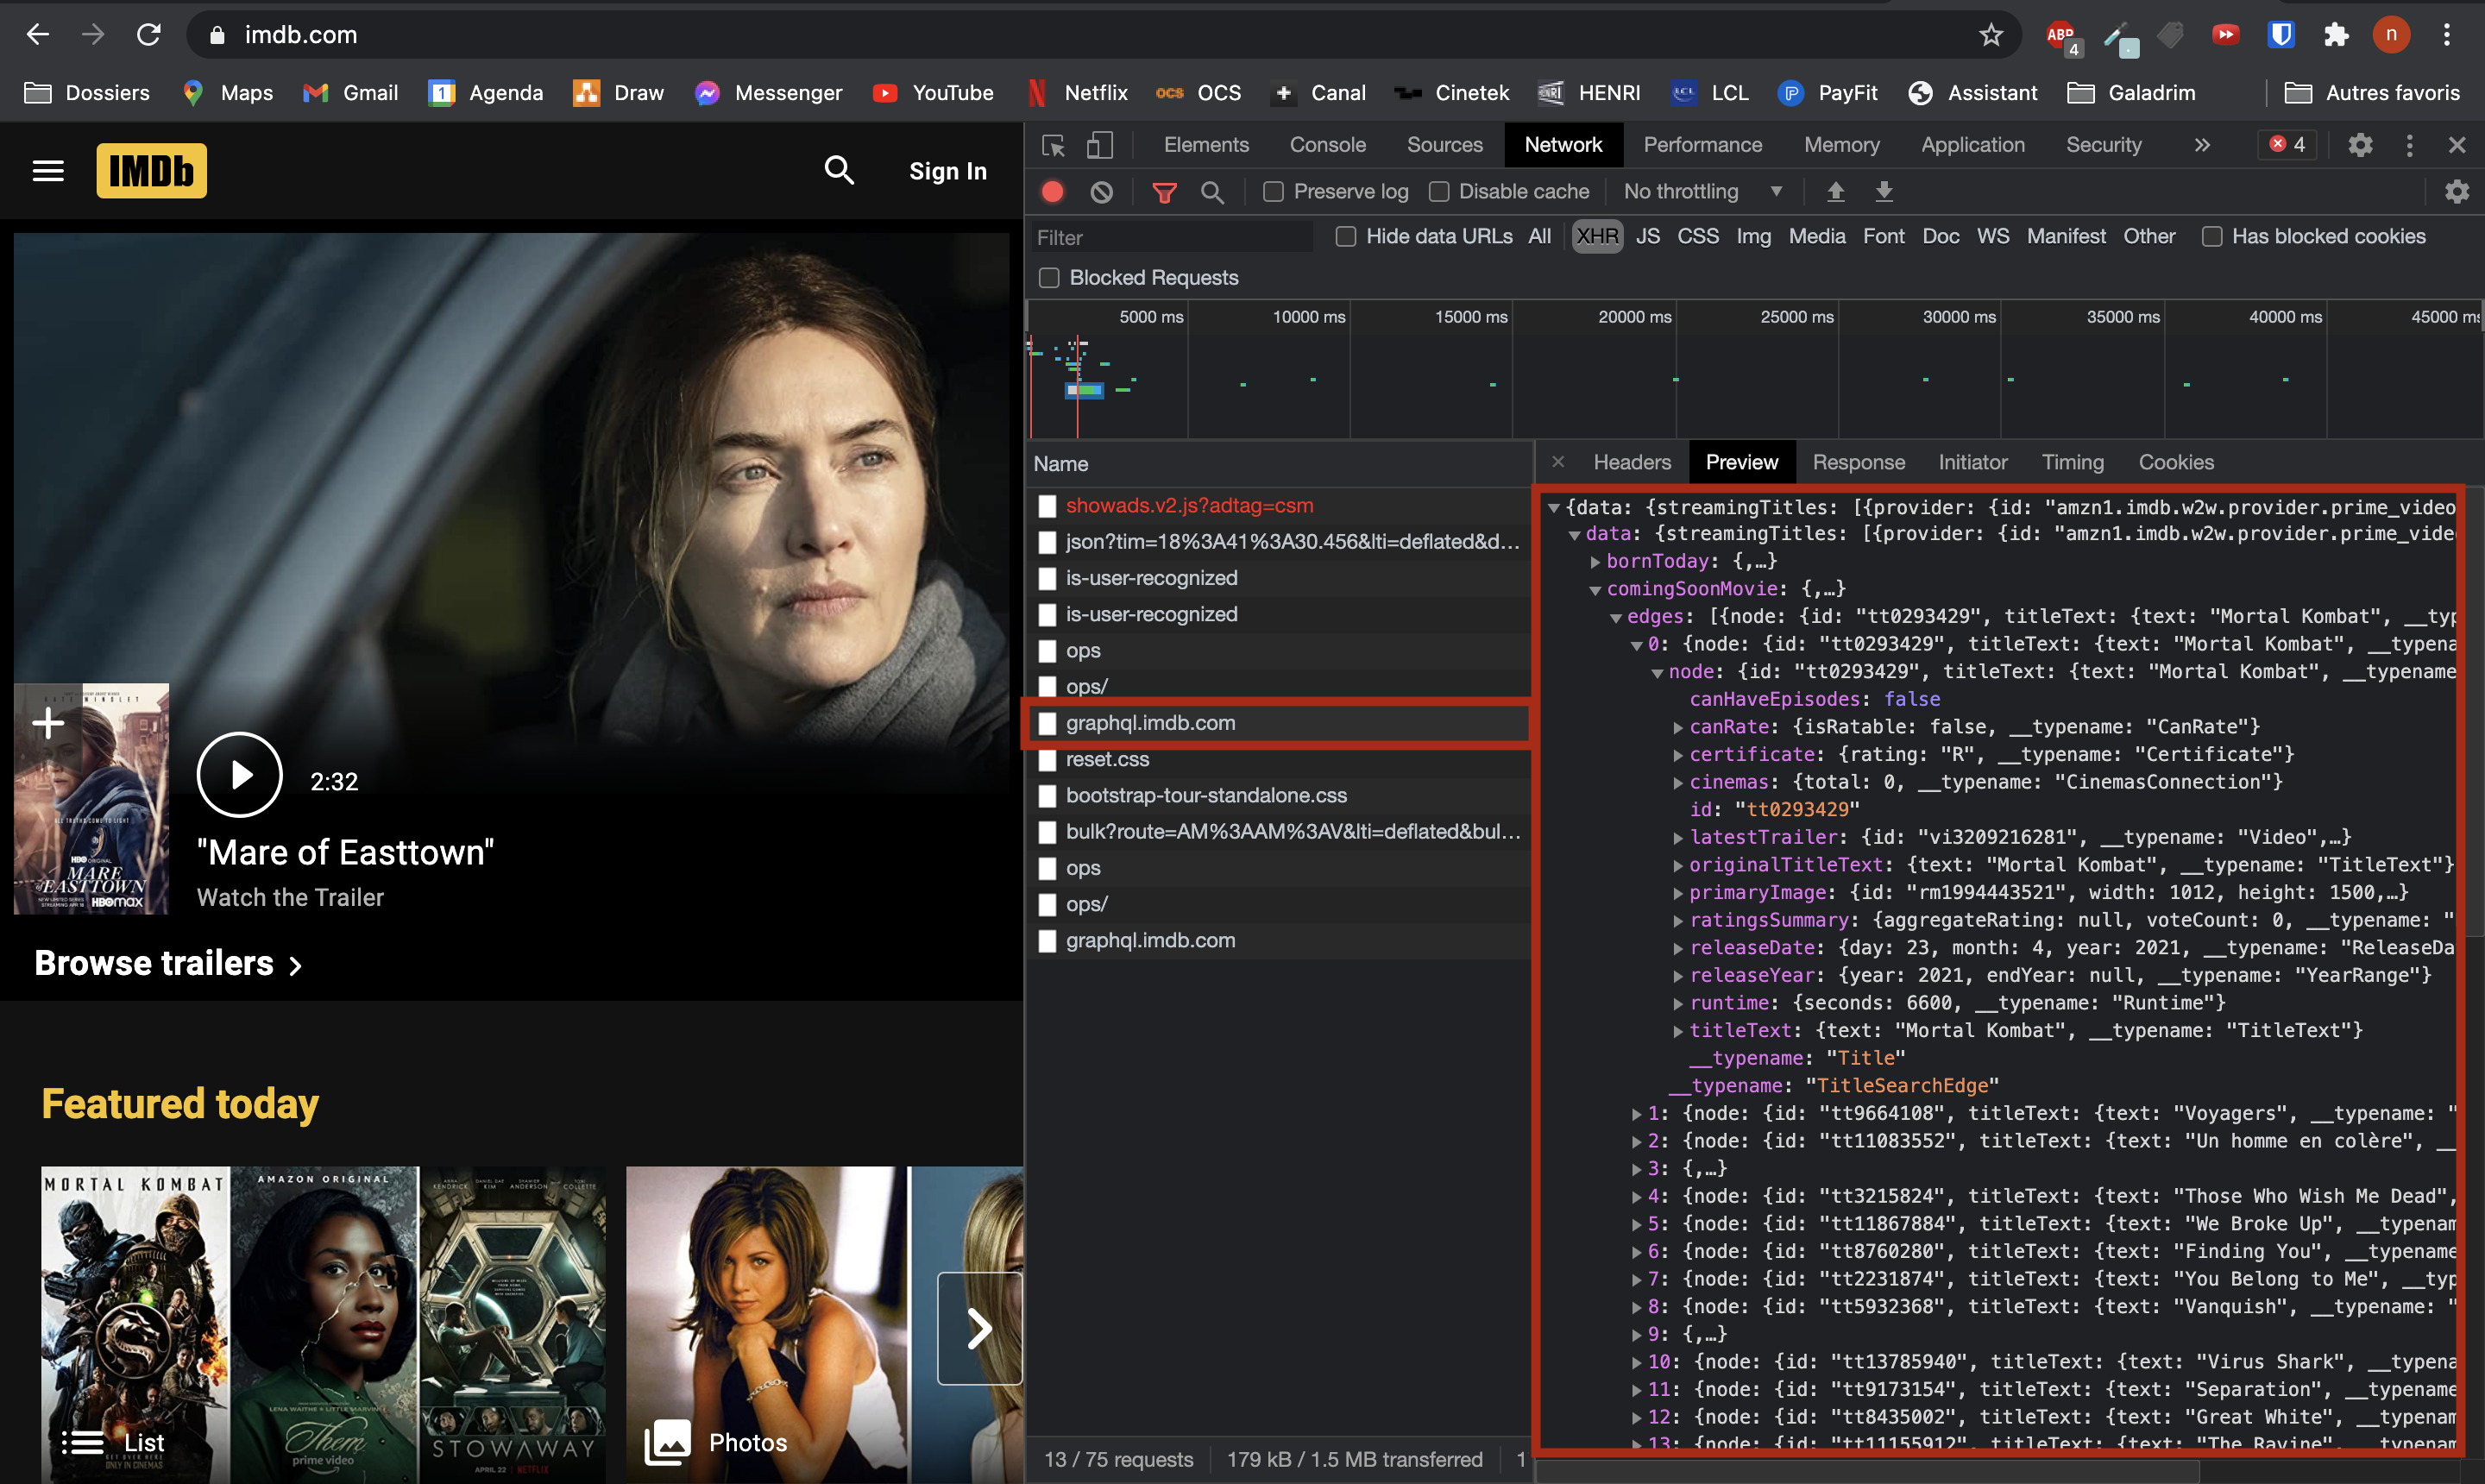
client side rendering, you can try to directly exploit the API that returns raw data (often in JSON or XML format) to your browser, which will then inject them into the HTML. To do this, you can look (in your browser's development tool in the “network” section) at the XHR requests that are sent when you refresh the web page to be scraped. Once you have found the request(s) that load the data you want to retrieve, all that remains is to try to forge this same request within a Python script (for example, by using the requests library). Thus, there's no need to go through scraping in the strict sense (no headless webdriver, parser, xpath, etc.).
Here, for example, on the IMDB website, one could try to exploit their GraphQL API.
Only if the API proves too difficult to exploit do I bring out the heavy artillery to scrape data displayed with Javascript: Selenium.
Case of Server Side Rendering
For sites using server side rendering (and functioning without an API call), you have no choice but to parse the page's HTML via a parsing library such as
Beautiful Soup and extract the data via their
xpath.
If your scraping project is substantial, I advise you to turn to
Scrapy, a fairly comprehensive Python crawling and scraping framework that allows you to test your xpaths via a terminal or integrate various plugins like
Splash, which allows you to enable Javascript on web pages.
Our problem: IP banning
Sometimes websites use prevention methods against scrapers. One of the most formidable methods that has long given me trouble is IP banning. The scraped site analyses the requests it receives live. If it finds that an IP is making too many requests to be a regular human user, it can ban that IP (for a shorter or longer duration). Thus, with the next request, your script will raise an error due to a 429 response from the server.
First solution - to add some sleep
To counter this method, the first simple solution one might think of would be to add “sleeps” between our different requests to slow down the execution of our script and avoid being detected by the scraped site. But suppose we have 30,000 pages to scrape with 30 seconds of sleep between two requests, the script would have to run for more than 10 days to get through the list of pages. This solution will certainly work with a sufficiently large “sleep” value but will therefore become interminable to execute.
Second solution - IP rotation with Scrapoxy
Another much more robust and faster-executing solution (as it doesn't contain any sleep) is to use the open-source service Scrapoxy. Scrapoxy enables scraping by redirecting requests through a set of proxies. These proxies are server instances hosted by AWS's EC2 service.
Summary of the solution studied in this article
A spider (Scrapy scraping instance) moves from link to link (“crawls” a set of pages)
Scrapy's requests to the targeted site's server are not made directly by your machine but are redirected to EC2 containers thanks to the Scrapoxy service.
As soon as a container sees its IP blocked, Scrapoxy relaunches a new army of containers to replace the old, unusable ones.
Prerequisites:
To follow this tutorial, you need to have Python and the pip utility installed on your machine.
AWS account creation and configuration
Account creation
If you don't already have one, create an account
AWS in order to access the various services available on the AWS console. In particular EC2, the service that provides on-demand servers and which will be used by Scrapoxy to create the proxies that will redirect our requests. To create an account, go here
here.
Note: You will need to enter your credit card details, so try to be vigilant about using the EC2 service which has a good Free Tier (750h of cumulative usage per month across all your instances) but which is not free indefinitely. So if you have 10 EC2 instances running in parallel, you will start to be billed after 750 / 10 = 75 hours.
IAM credentials creation
For Scrapoxy to have the right to manage your EC2 instances for you, you'll need to generate a key pair
access key and
secret access key. To do this, go to the AWS console, in your
security credentials (
here)
Expand the section Access Key and click on add a key. Keep the value of theaccess key id. Then click on “Show secret access key” and carefully note the value it provides or download it key file.
Warning: You will not be able to display it later.
Security Group creation
You must also create a security group. To do this, go to the AWS console on the EC2 service and more specifically to the security groups (on this URL, replacing the parameter region with the region you are using: https://console.aws.amazon.com/ec2/v2/home?region=us-east-1#SecurityGroups)
Note: We advise you to set yourself to the region eu-west-1
Click on the “Create Security Group” button, then:
AMI selection
Later, when configuring Scrapoxy, you will need an “AMI”.
If you are in the eu-west-1 region, you can choose one of these three AMIs depending on what type of instance you want to create for your script:
t1.micro ⇒ ami-c74d0db4
t2.micro ⇒ ami-485fbba5
t2.nano ⇒ ami-06220275
Make a note of the name of the chosen AMI for later!
Tip: Try with the first one (ami-c74d0db4), which generates t1.micro instances (the smallest possible). Indeed, we'll be asking these servers to make simple HTTP requests; no need to launch 'war machines'.
Installation and configuration of Scrapoxy
Scrapoxy Installation
To install Scrapoxy, please enter the following commands in a terminal: sudo apt-get install build-essential sudo npm install -g scrapoxy
Scrapoxy Configuration
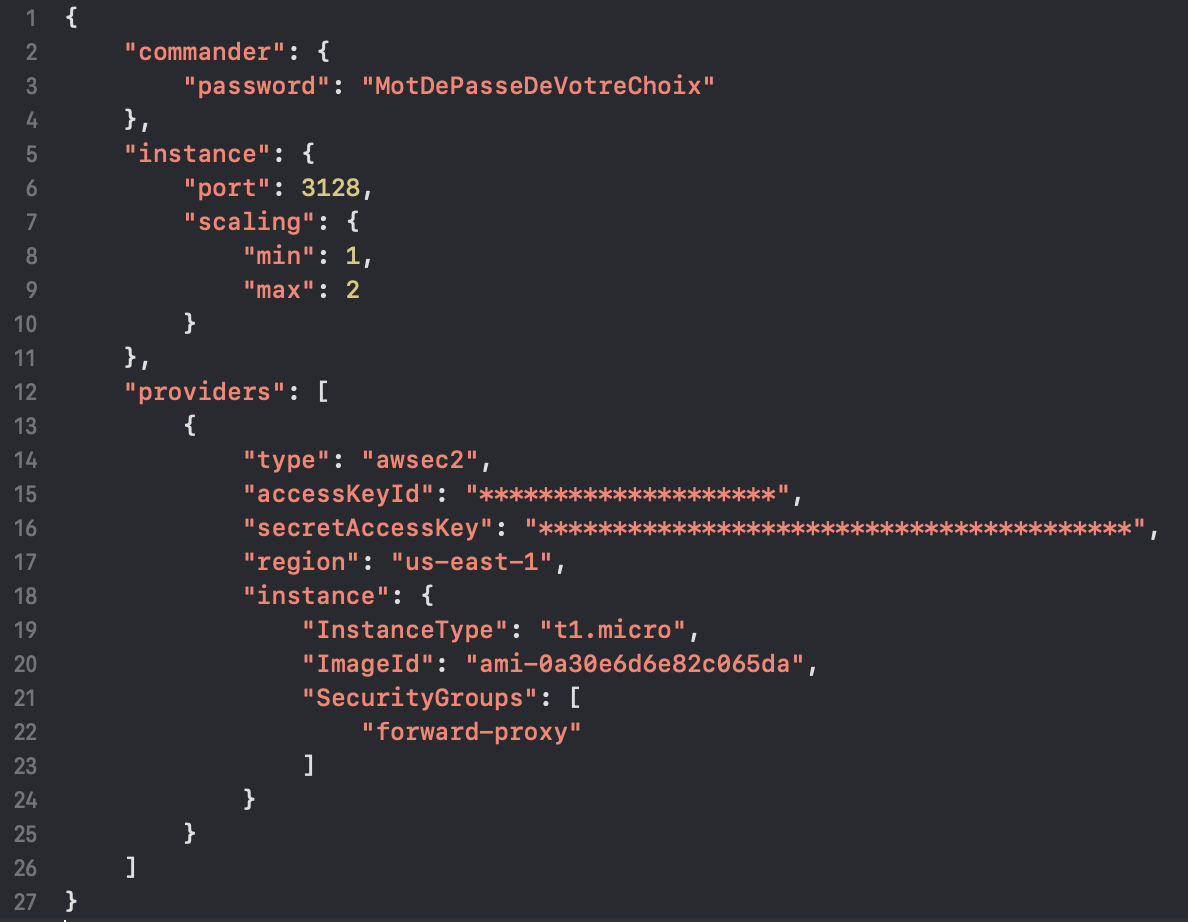
To use Scrapoxy and link it to your AWS account, you need to generate and fill in a configuration file. Start by entering the following command: scrapoxy init conf.json
Then in the conf.json file that has just been generated:
change the password in the section order (enter whatever you want, this password will be used to access Scrapoxy's graphical interface)
in the section provider, only keep the object with as type : “awsec2”
then replace the accessKeyId and secretAccessKey of this object with the credentials retrieved just before on AWS
also replace the AMI value (field ImageId) with the correct value
You don't need to touch the parameters related to the number of EC2 instances; you can adjust this directly via the graphical interface after launching Scrapoxy.
Launching Scrapoxy locally
To launch a Scrapoxy instance on your machine, enter the command in a new terminal: scrapoxy start conf.json -d
This terminal must remain open for the entire duration of the script execution we are about to present. The Scrapoxy instance will act as a dispatcher for requests between the various EC2 containers, analyse responses, and reboot containers when a request fails.
Note: When Scrapoxy is running, you can access a graphical interface (GUI) via the address: http://localhost:8889/. Additionally, the service will be accessible for Scrapy via the address: http://localhost:8888/.
Installation and use of Scrapy
Install Scrapy
To install
Scrapy with the pip utility, enter the command:
pip install scrapy scrapoxyCreate a new Scrapy project
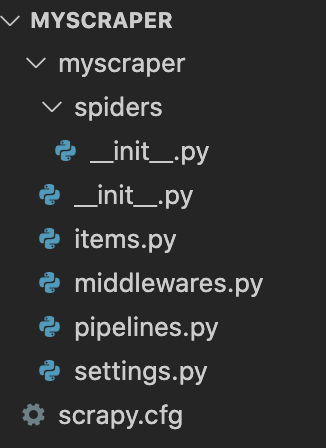
To create a new project (a new “spider”), enter the command in a terminal: scrapy startproject myscraper
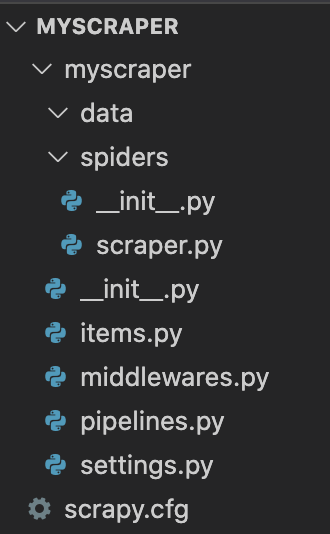
This command will create a myscraper folder with this tree structure:
Create a data folder within the myscraper subfolder and a scraper.py file within the spider subfolder to achieve this tree structure:
Integrate Scrapoxy into the Spider
To integrate Scrapoxy into your spider and have requests made by your EC2 instances rather than your machine, in myscraper/myscraper/settings.py, add the lines: language=python CONCURRENT_REQUESTS_PER_DOMAIN = 1 RETRY_TIMES = 0 # PROXY PROXY = 'http://127.0.0.1:8888/?noconnect' # SCRAPOXY API_SCRAPOXY = 'http://127.0.0.1:8889/api' API_SCRAPOXY_PASSWORD = 'CHANGE_THIS_PASSWORD' # BLACKLISTING BLACKLIST_HTTP_STATUS_CODES = [ 429 ] DOWNLOADER_MIDDLEWARES = { 'scrapoxy.downloadmiddlewares.proxy.ProxyMiddleware': 100, 'scrapoxy.downloadmiddlewares.wait.WaitMiddleware': 101, 'scrapoxy.downloadmiddlewares.scale.ScaleMiddleware': 102, 'scrapy.downloadermiddlewares.httpproxy.HttpProxyMiddleware': None, 'scrapoxy.downloadmiddlewares.blacklist.BlacklistDownloaderMiddleware': 950 }
If the site you are scraping returns a status code other than 429 to indicate that your IP has been blocked, you can specify it by adding the site's returned status code value to the BLACKLIST_HTTP_STATUS_CODES variable.
Writing the Spider
Let's now move on to the core of the scraping script: the spider.
A Scrapy spider consists of several parts:
Here is a code example of a spider, with examples in the parse() method on how to retrieve data from a parsed page. To find out more, consult the Scrapy documentation directly or inform yourself about the concept of xpath (
here).
You can copy this code into the scraper.py file you created earlier. Then, you just need to adapt the code to your target site. language=python import scrapy import csv class Scraper(scrapy.Spider): name = u'scraper' custom_settings = { 'FEED_FORMAT': "csv", 'FEED_URI': './data.csv', 'FEED_EXPORT_ENCODING': 'utf-8' } allowed_domains = ['www.site-url.com'] start_urls = [f"www.site-url.com/page?id={id}" for id in range(100)] def start_requests(self): total = len(self.start_urls) for i in range(total): print(f"############################## {i}/{total} #############################") url = self.start_urls[i] yield scrapy.Request(url, self.parse, meta={"url": url}) def parse(self, response): # Retrieve the entire HTML of a div (N.B.: copy/paste the result into an HTML editor # to more easily find the xpaths of the data to collect) data_0 = response.xpath("//div[@id='main-content']").text # Retrieve the src attribute of an img tag data_1 = response.xpath("//div[@id='main-content']/div/div/div/div[2]/div/div/div/div/img/@src").extract_first() # Retrieve category titles (title present in the title attribute of the category-div tag) # and item IDs present in the category (IDs present in the item URL) data_2_raw = response.xpath("//category-div") data_2 = "" for data_2_item in data_2_raw: title = data_2_item.xpath("./@title").extract_first() data_2 += "{}:".format(title) links = data_2_item.xpath("./div/div/div[2]/a/@href").extract() for link in links: data_2 += "{}/".format(link.split("/")[-1].split(".")[0].split("-")[-1]) data_2 = data_2[:-1] data_2 = data_2[:-1] yield { "page_url": response.meta['url'], "data_0": data_0, "data_1": data_1, "data_2": data_2 }
Launching the Spider
To launch the spider, execute the command in a terminal at the root of the myscraper folder: scrapy crawl scraper
Crawling
When you launch the Spider with Scrapoxy enabled on your machine, you'll first need to wait two minutes for the EC2 containers to be up and running. (You can disable this waiting time to test your script more easily via the myscraper/myscraper/settings.py file by commenting out the line language=python 'scrapoxy.downloadmiddlewares.wait.WaitMiddleware': 101)
Then, monitor that everything proceeds as expected: a series of requests that returns 200 responses, then, after a certain time, a request that fails following a 429 response, followed by a 2-3 minute sleep to restart the EC2 containers.
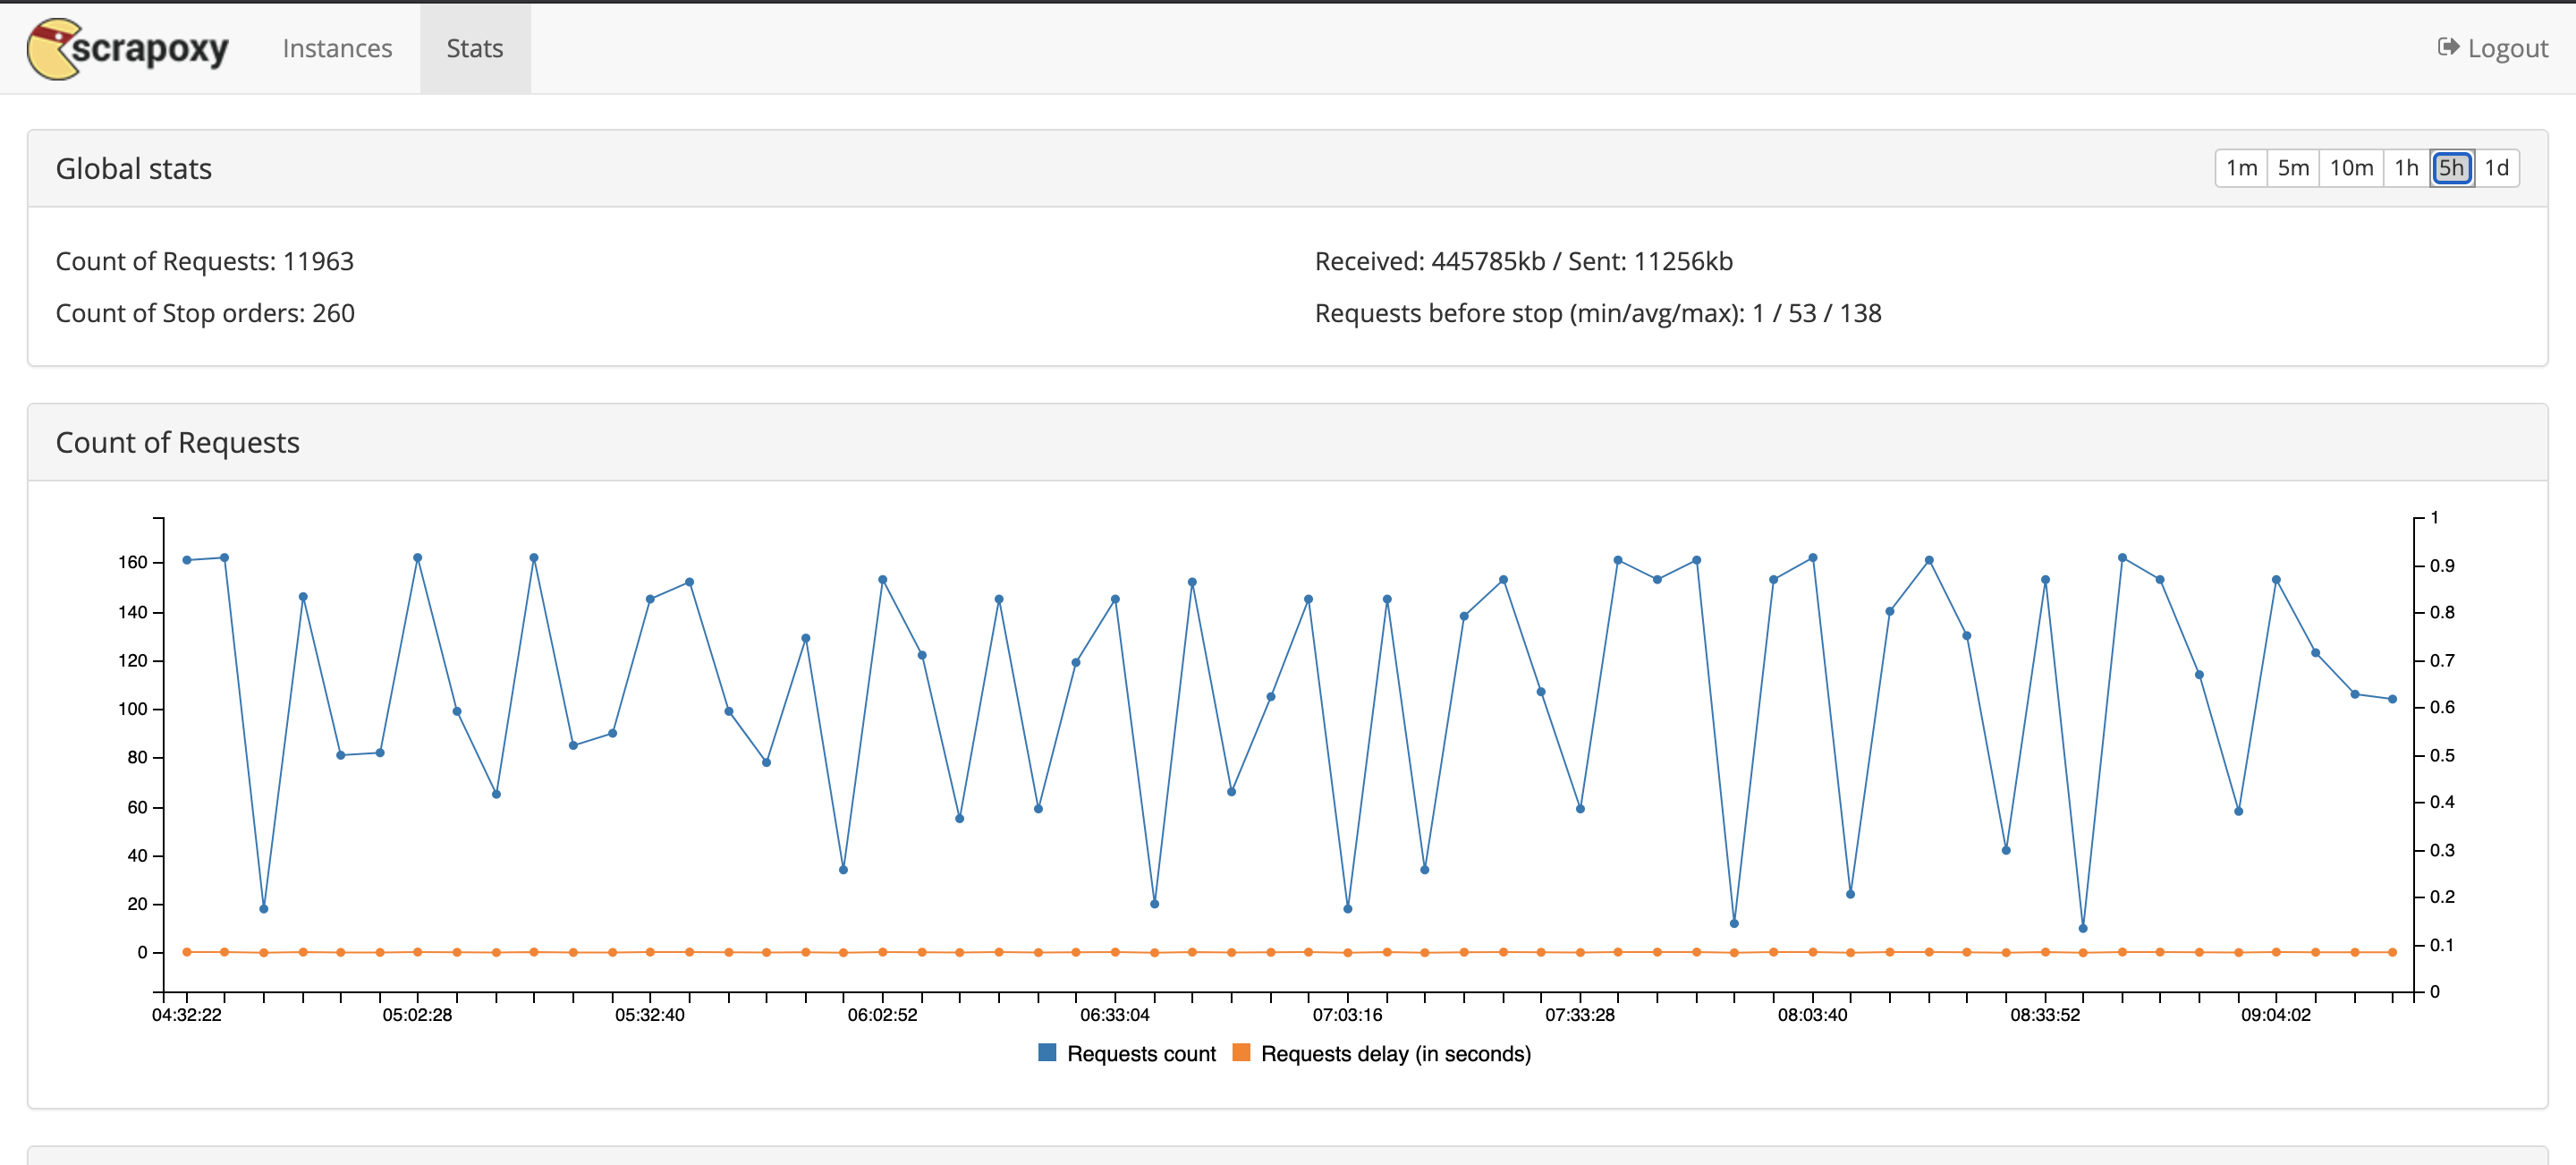
You can change the desired number of EC2 instances at any time via Scrapoxy's GUI (normally accessible at http://localhost:8889/). On this GUI, you can also consult your request stats since the service launched.
Conclusion
If you need to remember three things from this article, they are as follows:
If you need to scrape data from a website, don't jump straight into advanced scraping tools! Firstly, try to utilise the site's API. To do this, use any HTTP request library in your preferred language.
If that doesn't work, resort to more traditional scraping (HTML parsing, headless browser, etc.).
If the scraped site blocks your IP when you make too many requests, two options are available to you:
If you need to scrape a small number of pages and/or script execution time is not an issue, try putting 'sleeps' in your code between requests.
If that doesn't work or you need to scrape too many pages for this technique to be feasible (script execution time too long), then configure Scrapoxy to rotate the IP used by your script to make its requests.