Implementing a scalable architecture for your back-end might sound like a real challenge. The reason is, an application's scalability is always presented as a difficult problem to overcome: even if you've chosen the best technologies for your project, you'll have increasing resource demands, inconsistent demand, and perhaps even difficulties ensuring competitive uptime.
Rest assured, all of this is over. Scalability is, above all, about choosing the right tools. In this article, you will learn how to deploy your back-end online using the service
Elastic Beanstalk (EBS) from AWS automatically during a push to your Github repository.
Motivations
Who is it for?
Elastic Beanstalk allows you to deploy a wide range of technologies online (Java, PHP, Python, Ruby, Node.js, etc.). Amazon charges for its services based on your usage (the "pay as you go") and
the free version allows you to benefit from more than sufficient use of these services if you simply want to discover AWS.
Why?
Our goal is to deploy our back-end on EBS so that we don't have to worry about its scalability, thanks to Amazon's infrastructure, and to have competitive uptime. This article will be divided into several parts, starting from the premise that you are new to AWS:
Create our application on Elastic Beanstalk (to host the back-end)
Create an access key for our application (to have the rights to deploy the back-end)
Create a Github Action (to automatically deploy the back-end with each push)
(Optional) Set up environment variables
Implementation
Prerequisites
Create our application on Elastic Beanstalk
We will analyse the practical case of setting up a NestJS application on Elastic Beanstalk. We will therefore use the Node.js environment, but you can, of course, adapt it according to your needs.
Go to the " serviceElastic Beanstalk" in the AWS console. Make sure to select the region where you want to deploy your application from the drop-down menu in the top right. Then, create your application.

Interface AWS Elastic Beanstalk
Enter your application's name, for example "MonapplicationAPI". Then select the platform (for our example, "Node.js"). You can leave the other fields as they are. Click "Create application" at the bottom of the page.
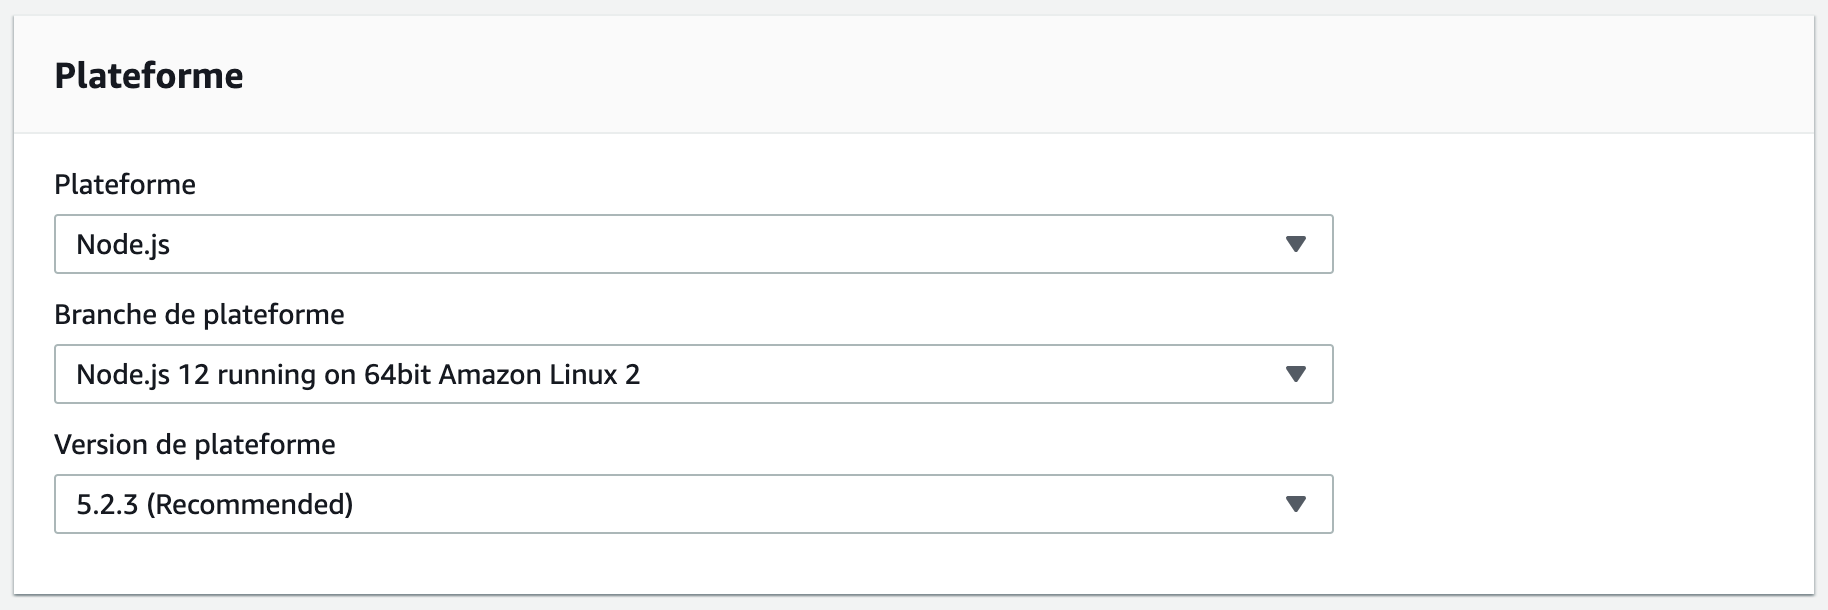
Choice of the Beanstalk application platform
AWS has created your application "MonapplicationAPI" and is now creating the environment associated with the application: "Monapplicationapi-env". This operation may take 5 minutes. We can move on to the next step during this time.
Create an access key for our application
Our goal is to automatically deploy our back-end via Github Actions. To do this, we will create an access key that will allow Github to connect to our AWS account.
Change service (top left menu) and go to the " serviceIAM".

Searching for the AWS "IAM" service
We are going to create a new user. Go to the "Users" section, then click on "Add user"
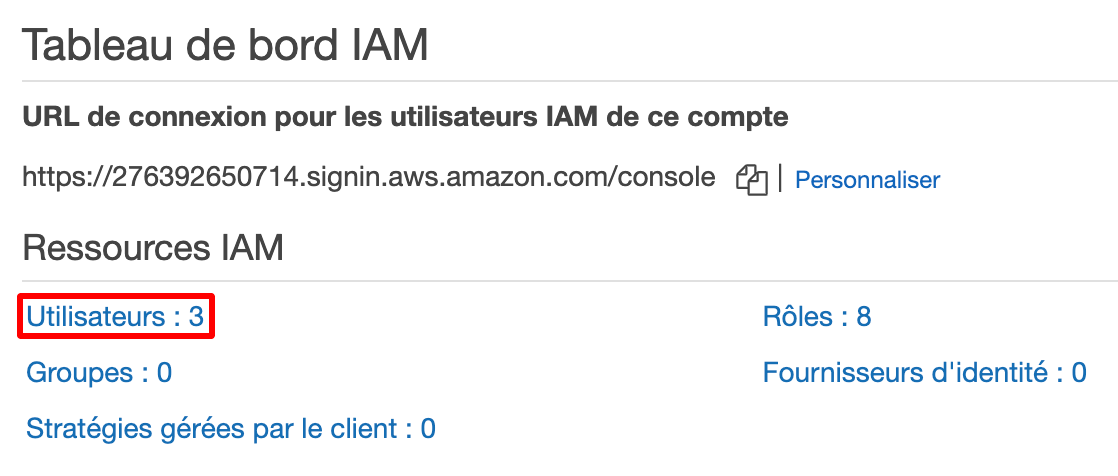
AWS IAM Service "Users" section
We will name our user "MonapplicationAPIDeploy" and select the access type "Programmatic access". You can then click on "Next: Permissions".
We can now select "Attach existing policies directly" and check the policy "AWSElasticBeanstalkFullAccess". You can then click on "Next: Tags".
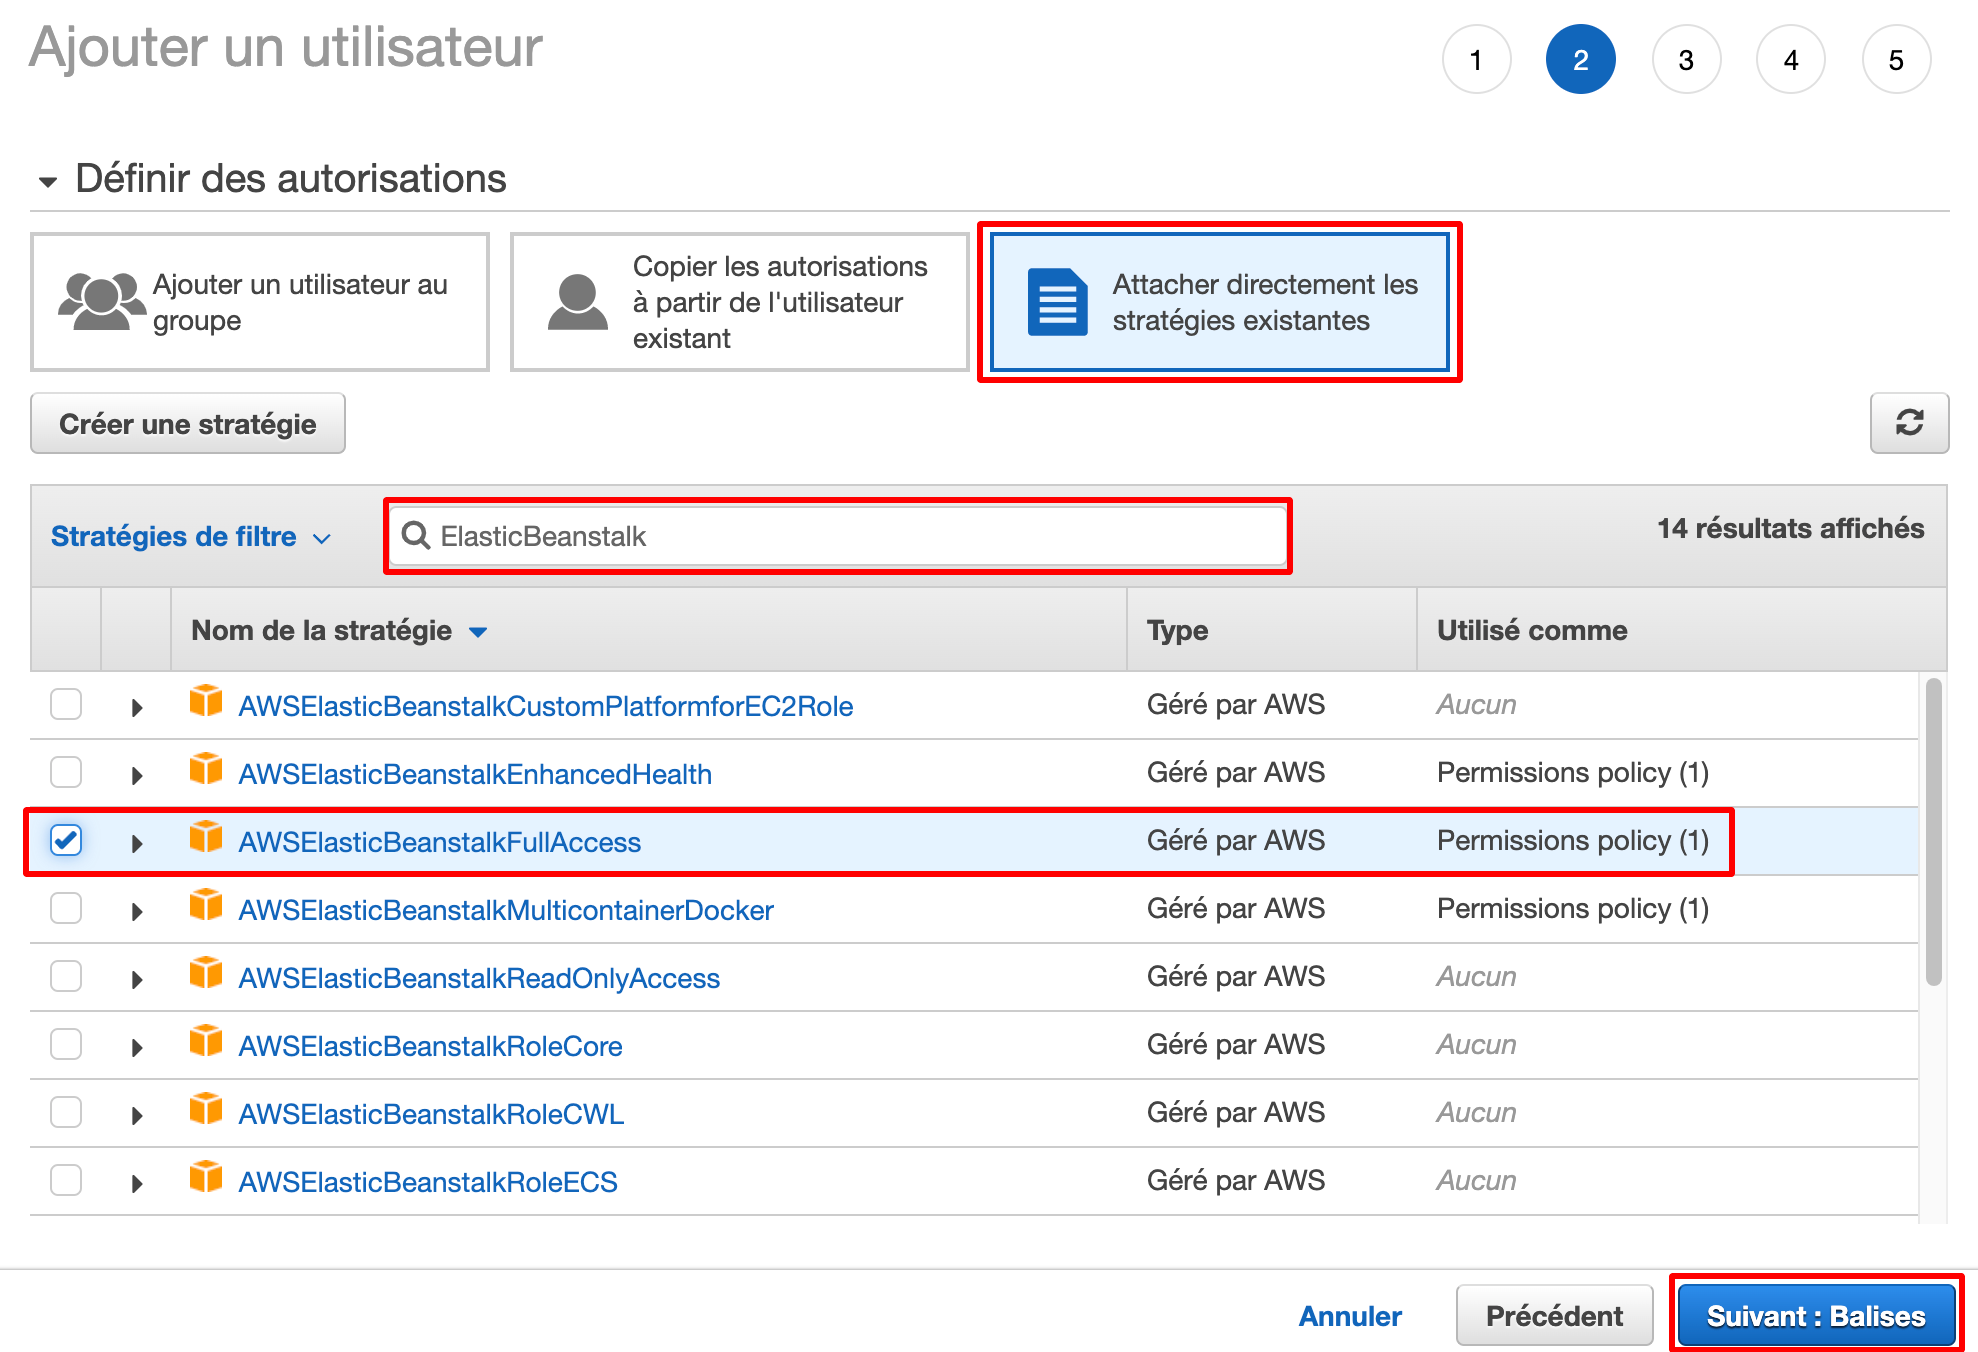
Selecting an access strategy for the IAM user
Nothing to do for the "Tags" step, you can click on "Next: Review" then on "Create user".
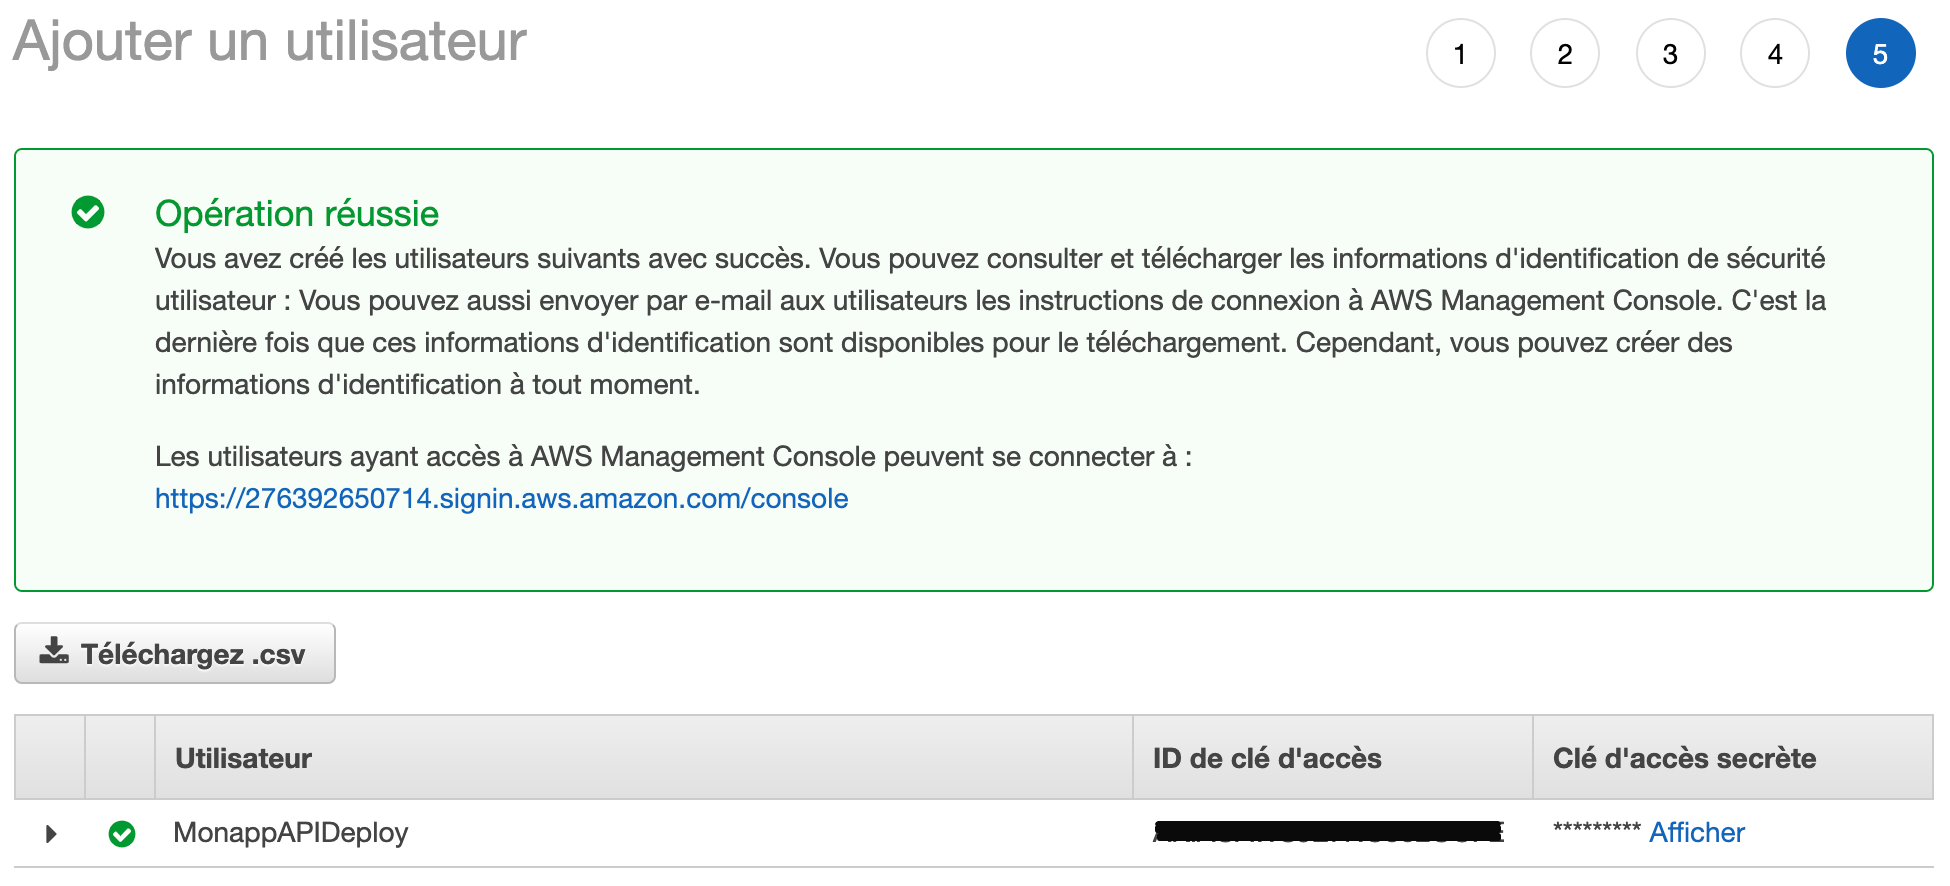
Retrieving IAM access keys
Please make a note of your access key ID "AWS_ACCESS_KEY_ID" and your secret access key "AWS_SECRET_ACCESS_KEY". We will use them shortly to set up the deployment on GitHub.
Create a GitHub Action
Preamble
Before continuing and setting up our automatic deployment action, we will need to add two files to our repository to configure Elastic Beanstalk. Don't worry, the procedure is very simple. Place yourself at the root (where your package.json is located):
1. Create a file ".ebignore" in which you will put:
node_modules
2. Create a file "Procfile" in which you will put your command to launch the back-end (in my case "npm run start:prod") :
web: npm run start:prod
3. You will absolutely need to listen on the port provided in the environment variable PORT by Beanstalk. In the case of NestJS, check that your "main.ts" contains this line:
await app.listen(process.env.PORT);
You will then need to enter the two AWS keys that we previously created in the IAM service. Go to your GitHub repository, in the "Settings > Secrets". So, add the two created keys:
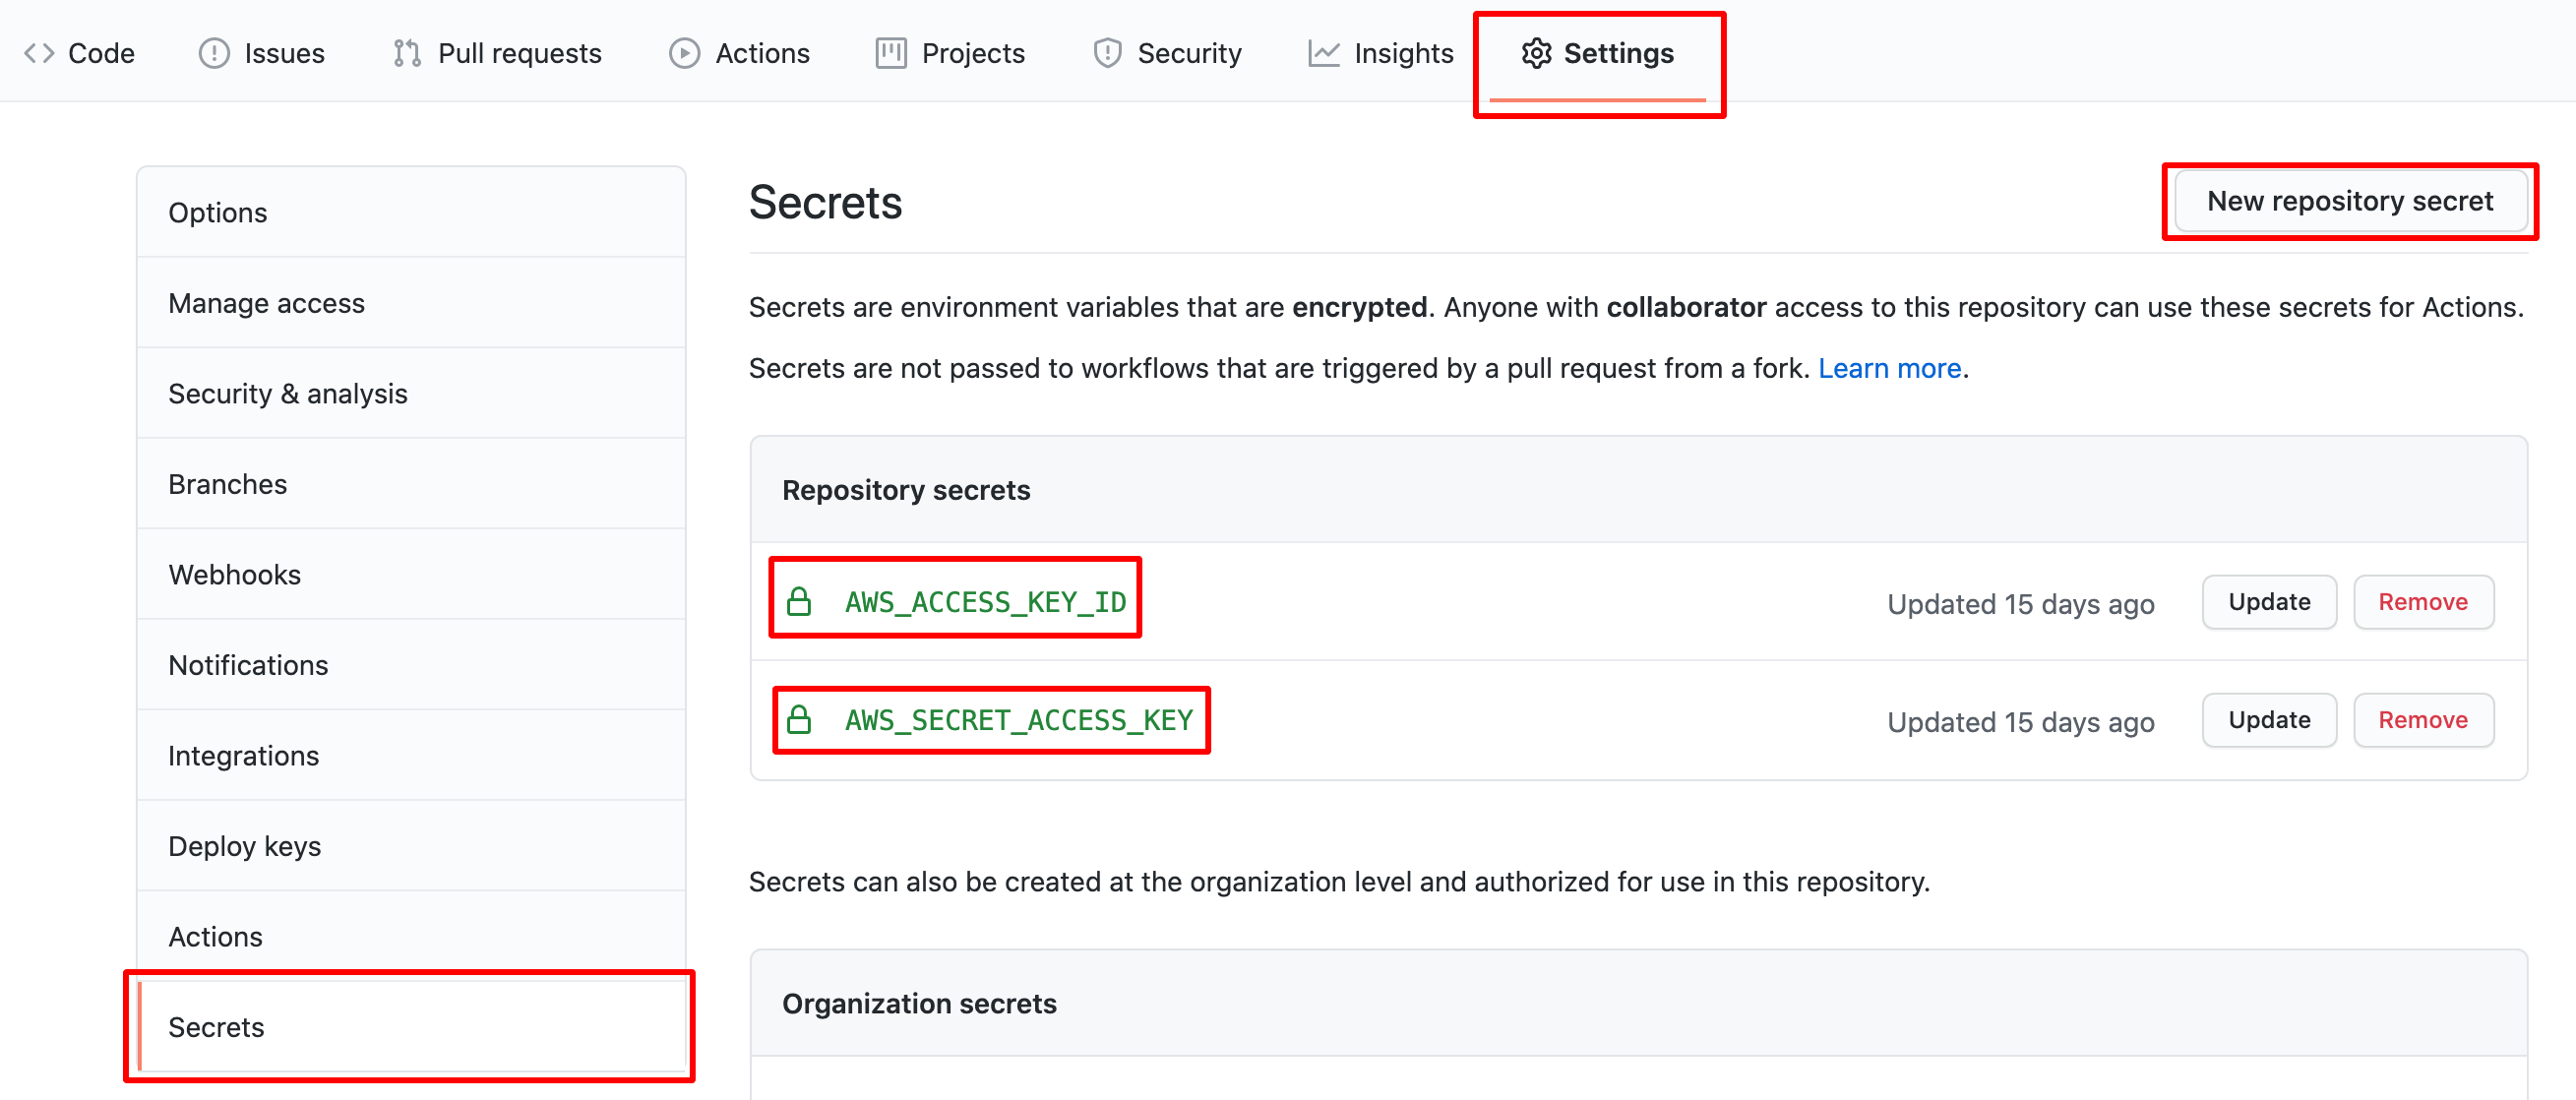
Adding secret variables to a GitHub repository
Creating the action
Go to your GitHub repository, in the "Actions". We are going to create a new workflow by clicking on the "New workflow" top left. Set up a new workflow manually:

Creating a new workflow in Github Actions
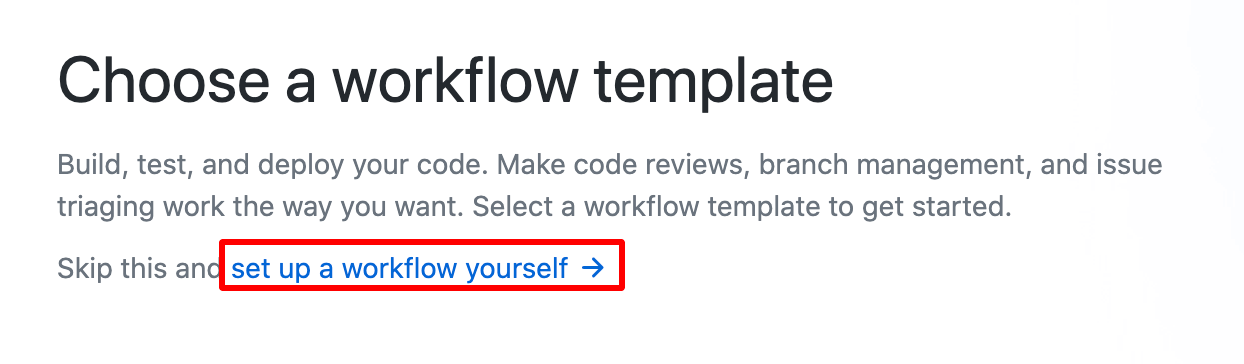
Setting up a workflow manually
Replace the content of the file "main.yml" with this:
name: Deploy back-end
on:
  push:
    branches:
      - master

jobs:
  build:
    runs-on: ubuntu-latest
    steps:
      - name: Checkout source code
        uses: actions/checkout@v1

      - name: Load cache
        uses: actions/cache@v2
        with:
          path: "**/node_modules"
          key: ${{ runner.os }}-modules

      - name: Install dependencies
        run: yarn install

      - name: Build App
        run: yarn build

      - name: Generate deployment package
        run: zip -r deploy.zip . -x '*.git*'

      - name: Deploy to EB
        uses: einaregilsson/beanstalk-deploy@v13
        env:
          VERSION_LABEL: monapplication-api-${{ github.run_id }}
        with:
          aws_access_key: ${{ secrets.AWS_ACCESS_KEY_ID }}
          aws_secret_key: ${{ secrets.AWS_SECRET_ACCESS_KEY }}
          application_name: MonapplicationAPI
          environment_name: Monapplicationapi-env
          version_label: ${{ env.VERSION_LABEL }}
          region: eu-west-3
          deployment_package: deploy.zip
Replace the values of "application_name", "environment_name" and "region" with those that apply to you. The application name corresponds to the Elastic Beanstalk application name and the environment name to the Beanstalk environment.
If you are not using Yarn and/or JavaScript, remember to adapt the commands to install your application's dependencies and build it. Here, I perform these actions in steps 2, 3 and 4: "Yarn cache", "Install dependencies" and "Build app". For step 2, caching dependencies, you can find documentation on the procedure to follow depending on the language you are using on this page. Once the changes have been made, you can commit your configuration file like this:
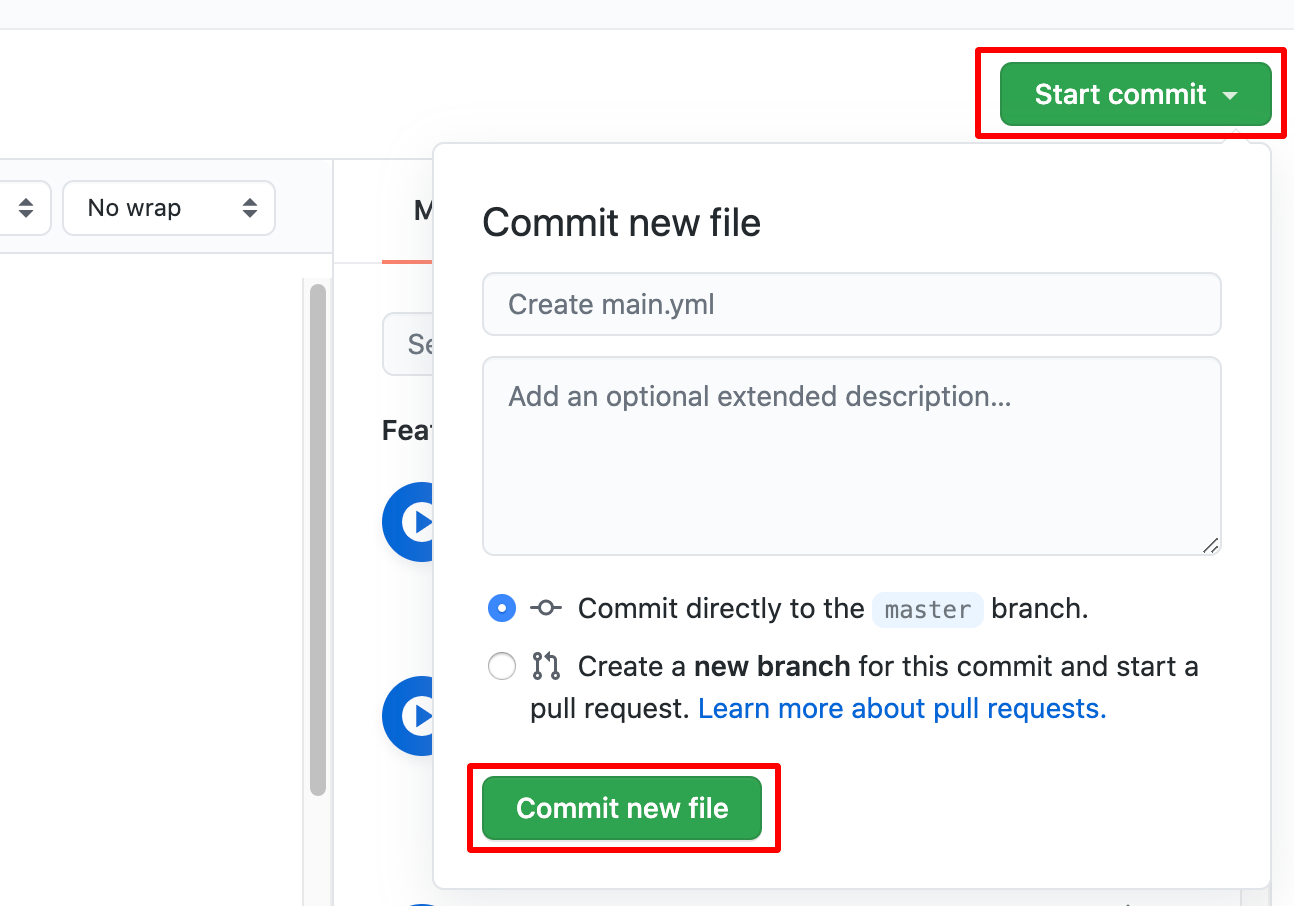
Creating our Github Action configuration file
(Optional) Set up environment variables
If you have environment variables to expose to your back-end, you can add them from your Beanstalk application's environment interface. To do this, go to the "Elastic Beanstalk" and select your environment (in this tutorial "Monapplicationapi-env") :
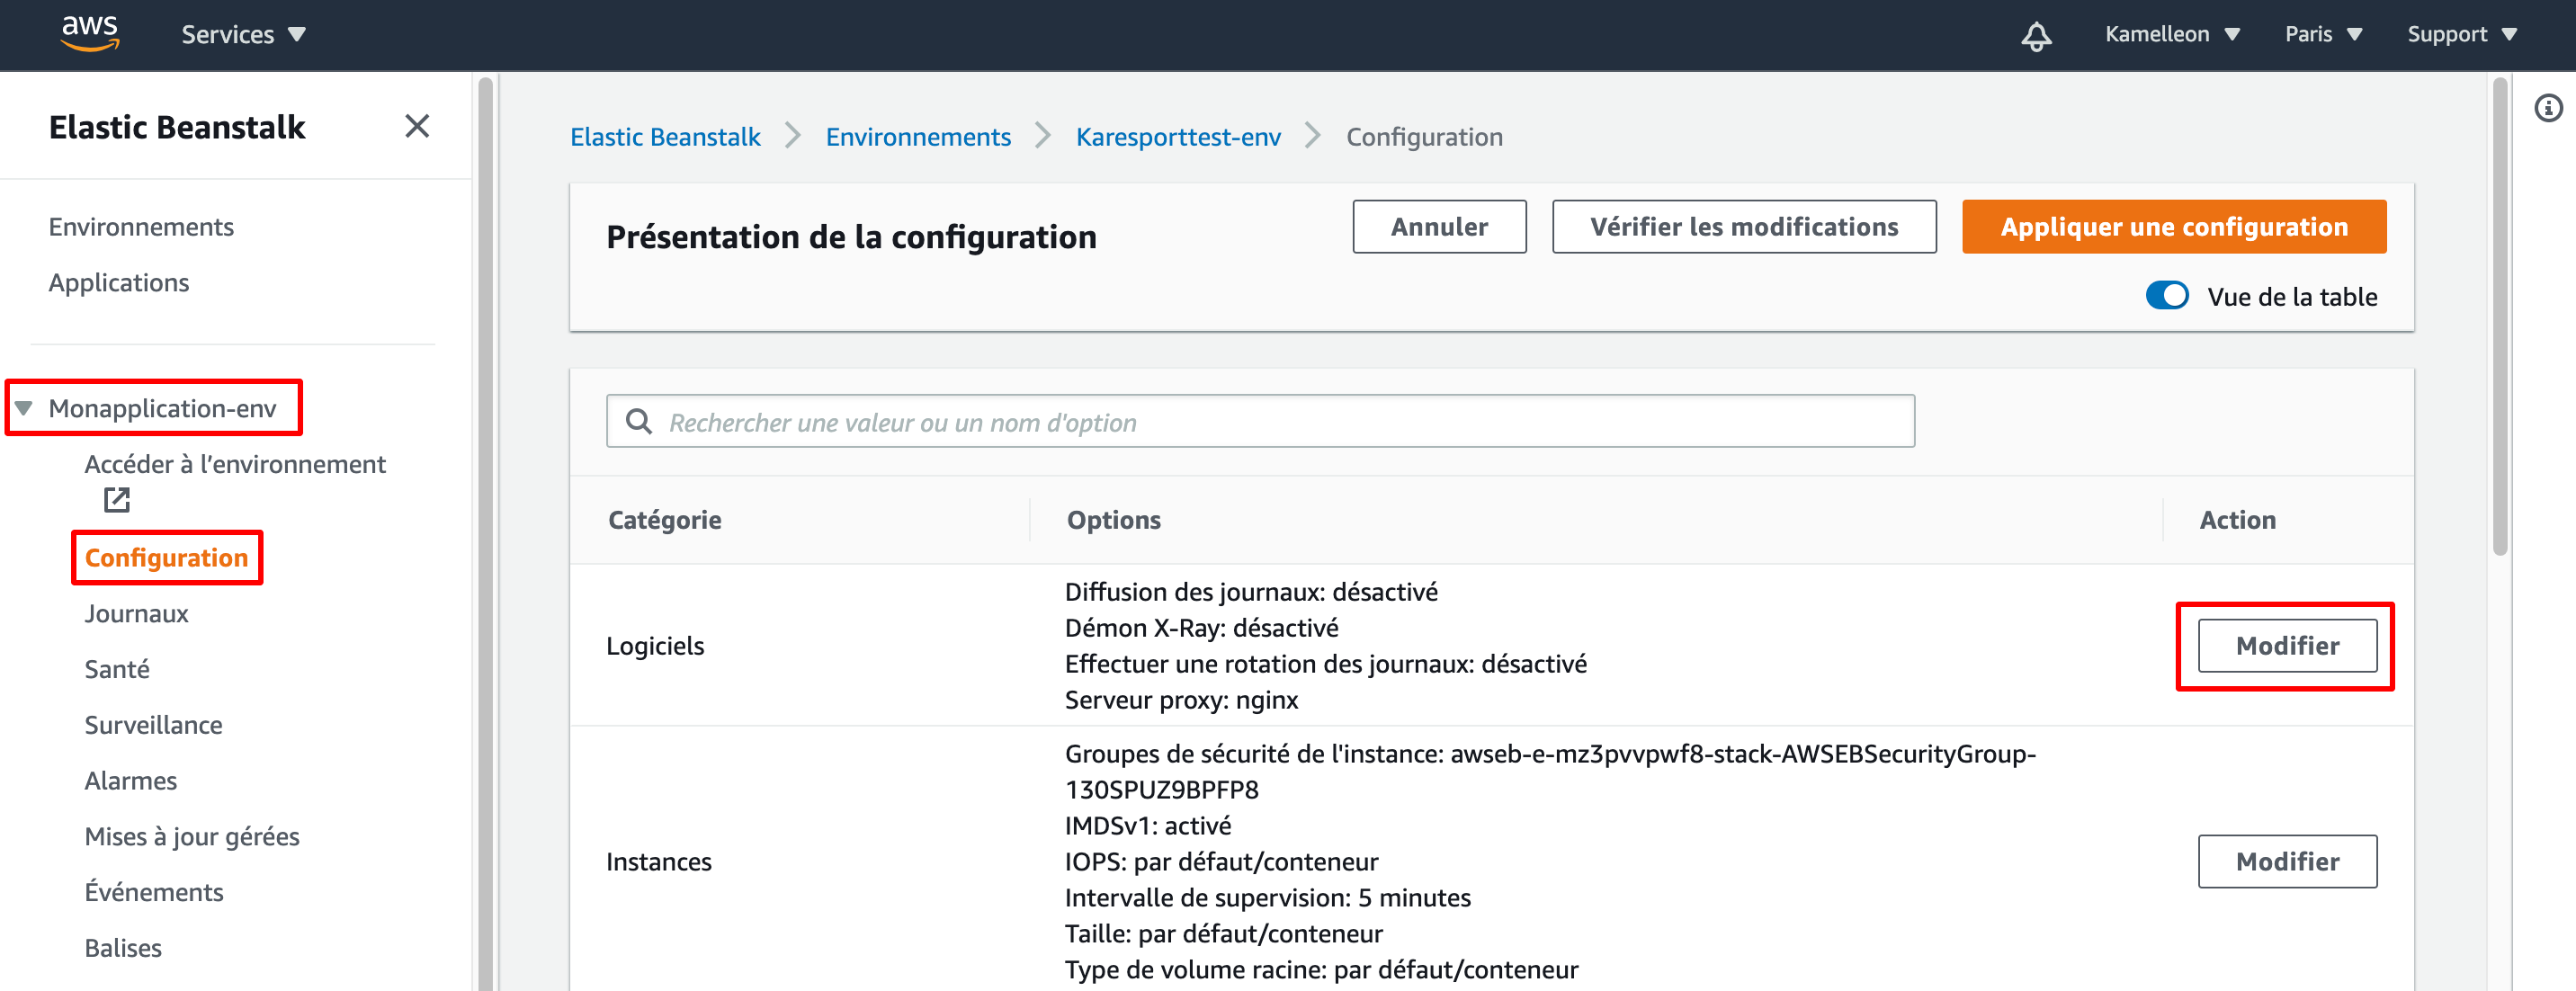
Accessing the Elastic Beanstalk environment configuration
You can define your environment variables at the bottom of the page in the section "Environment Properties" :
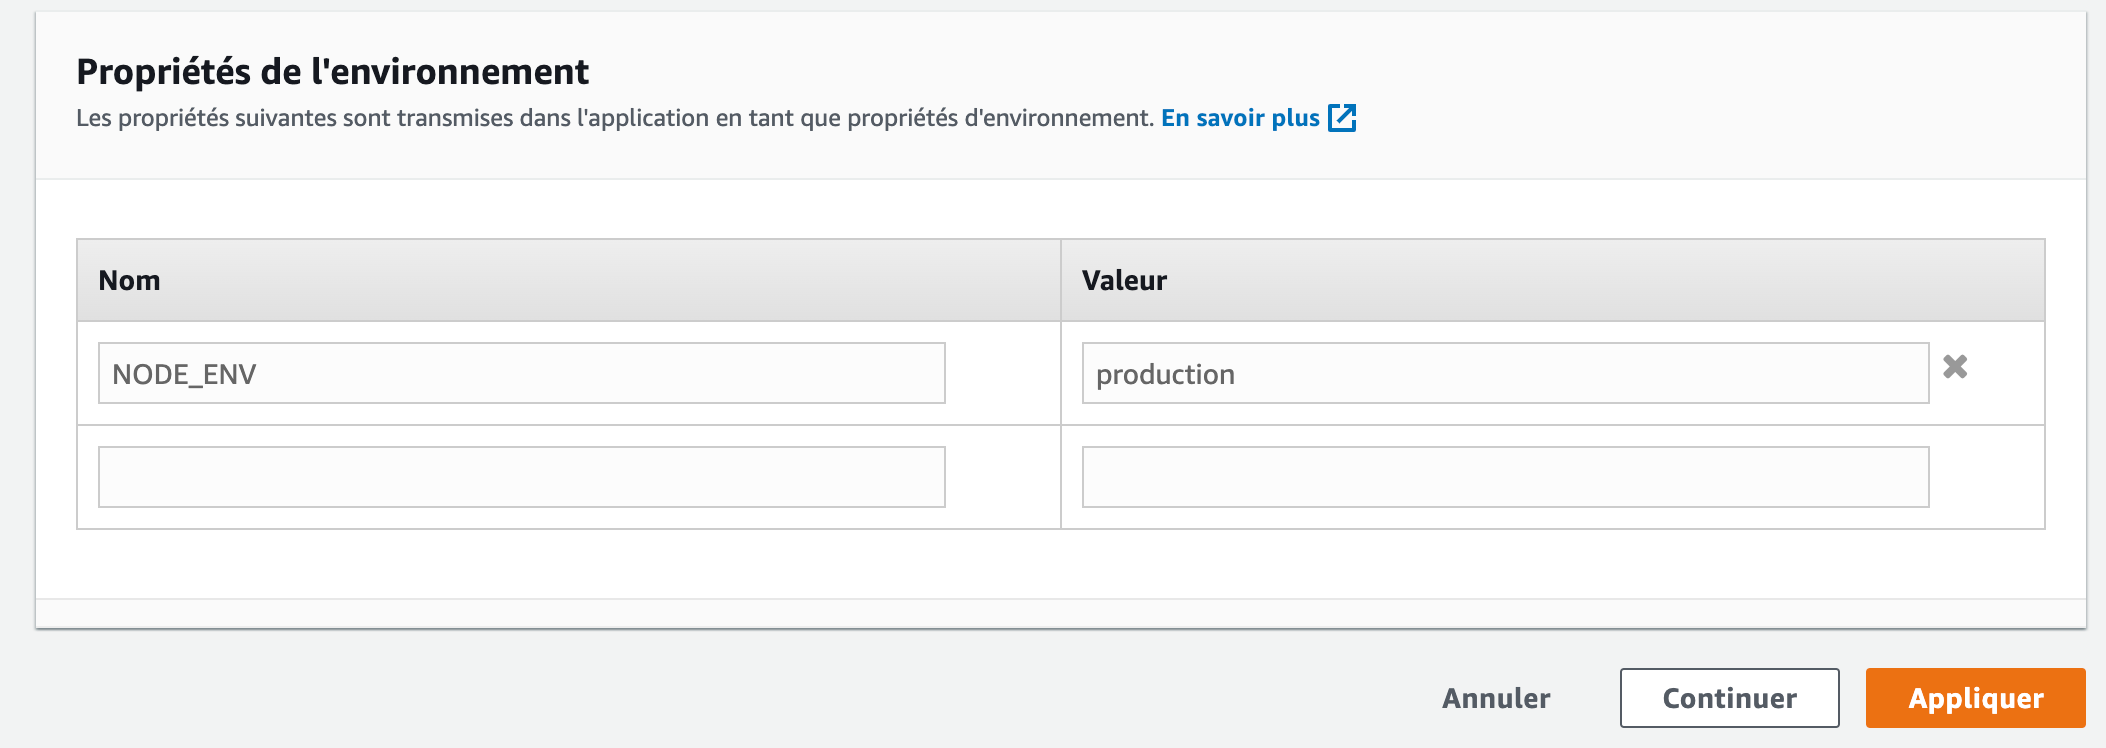
Adding environment variables
Conclusion
Congratulations, you have reached the end of this article. From now on, a push performed on the "master" branch of your repository will trigger the deployment of your application to your Elastic Beanstalk application. You can observe the status of your application on the "Elastic Beanstalk" AWS service:
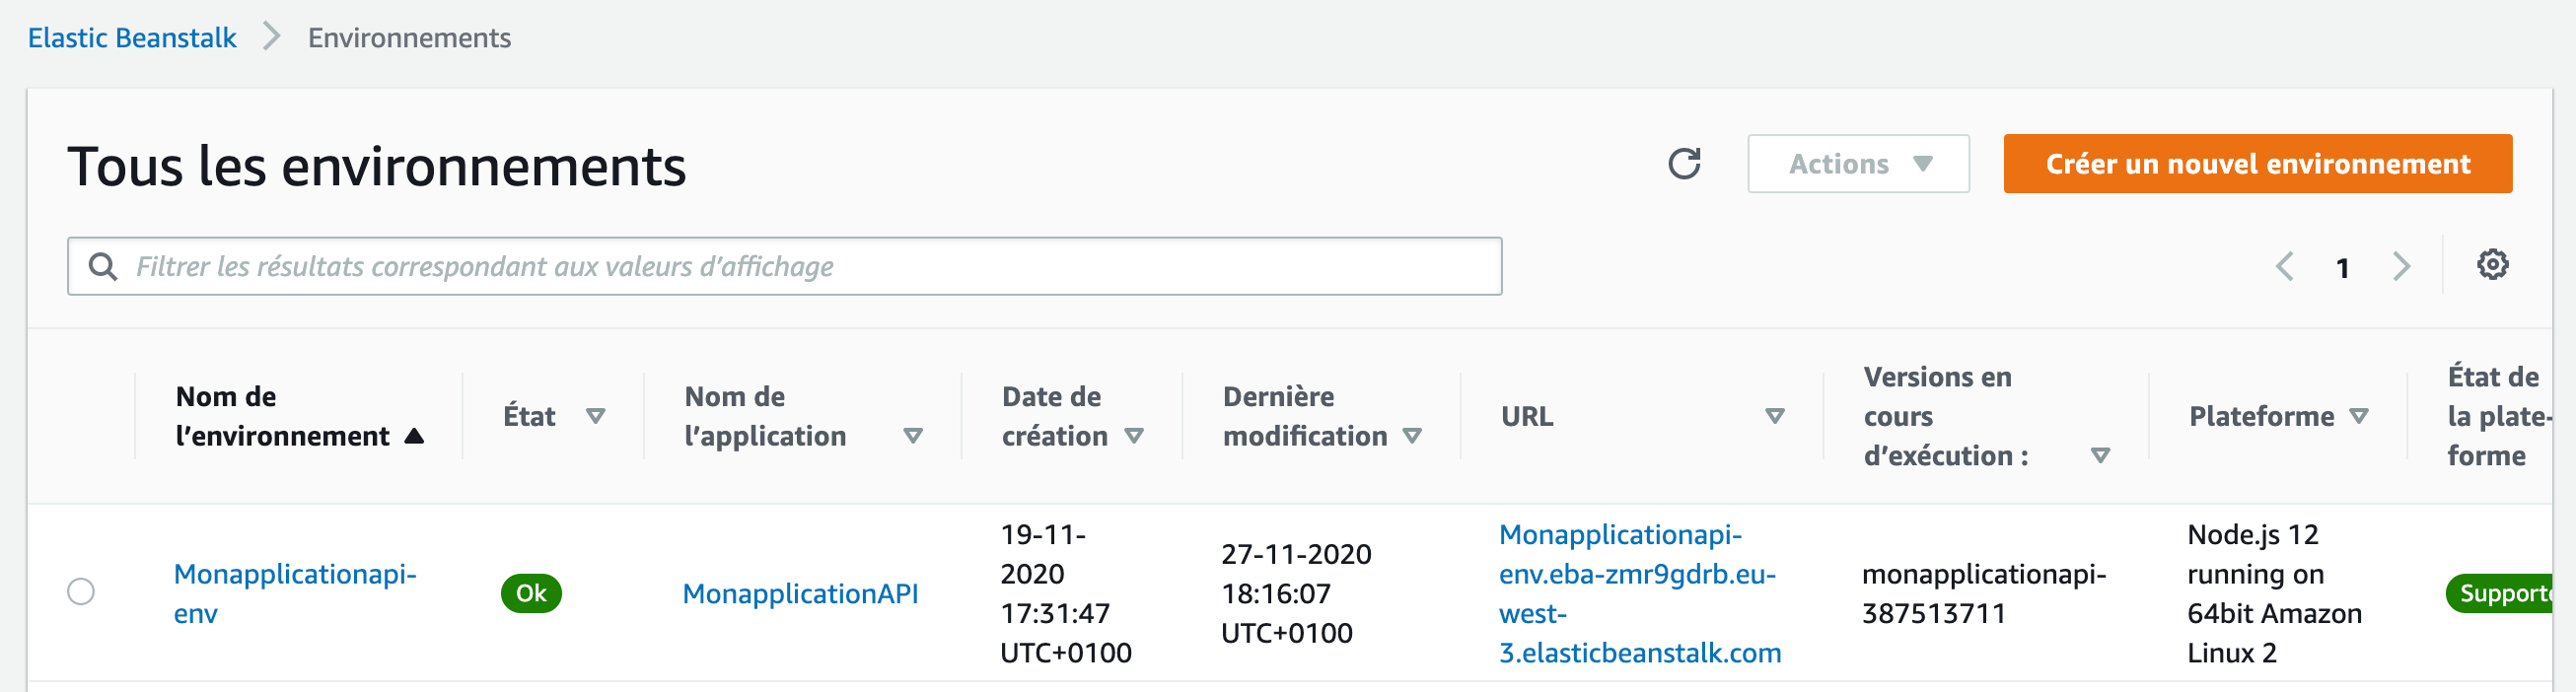
Status of our deployed environment
To go further
You can, if you wish, set up multiple development environments: "Staging" and "Production" corresponding respectively to a "staging" branch and a "master".
You can find documentation on
workflow_dispatch to set up a manual trigger rather than an automatic one for your Github Action.
Case studies